123FormBuilder Knowledge Base
Search our documentation platform for answers, service specifications and 3rd-party integrations.
How to integrate 123FormBuilder with MailChimp
With the 123FormBuilder – Mailchimp integration, you can import emails and leads from your submitters to your Mailchimp lists or unsubscribe them. Provide your Mailchimp API Key and select Customize to set up your integration.
Mailchimp API key
To retrieve the API key of your Mailchimp account, follow the steps below:
1. Log in to your Mailchimp account and go to your account settings (your username → Account).
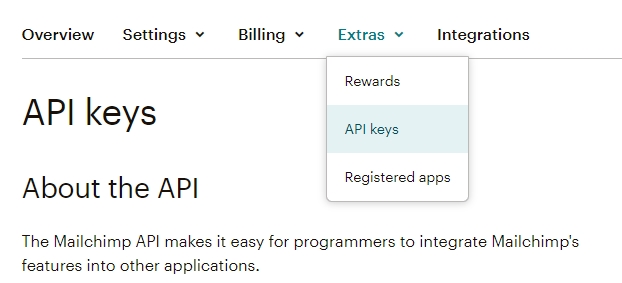
2. Afterward, go to Extras and select API keys from the dropdown list.
3. Press Create A Key and a code will be generated on a line below Your API keys. That is your API key.

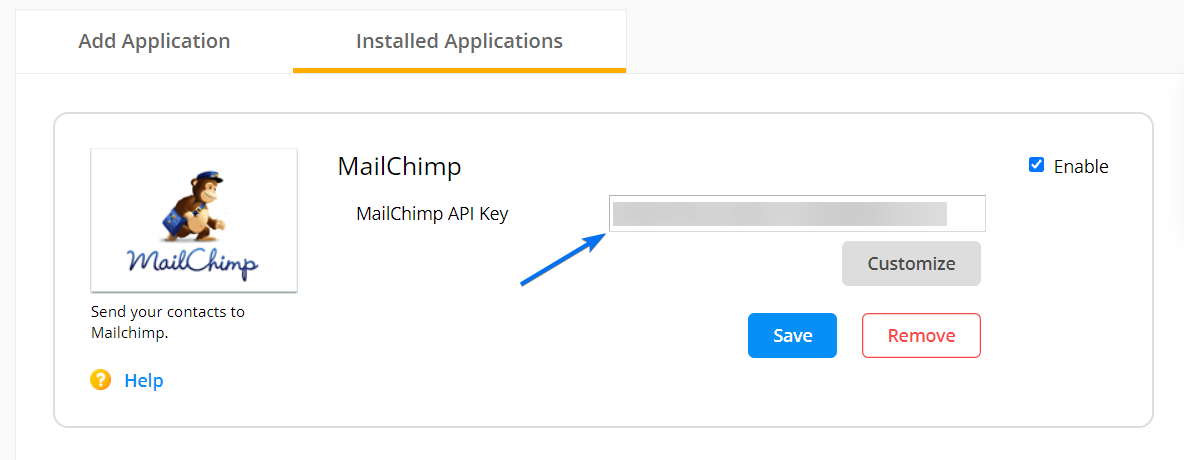
4. Copy-paste the API key in the Mailchimp application box from your form builder account.
Customizing the integration
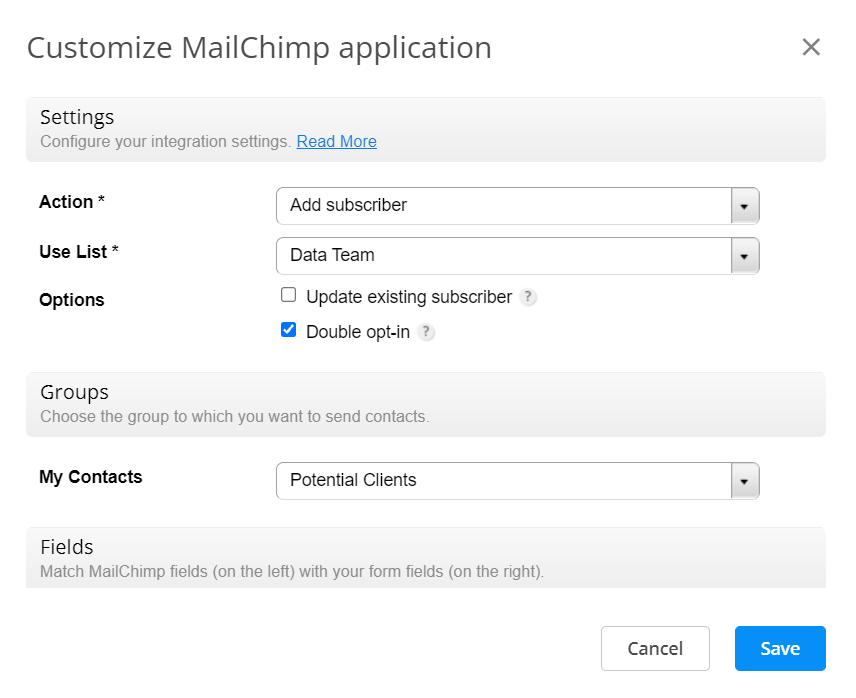
In the Customize lightbox, use the Action dropdown to select any of the two available options:
- Add subscriber
- Unsubscribe email
You cannot select more than one action per integration. The first action will create a new subscriber in the mailing list you have selected in the Use List dropdown. The second action will unsubscribe the email address that has been specified on the form.
In Options, you can choose to update existing subscribers or add a double opt-in to request confirmation before adding new subscribers to your list. It’s important to mention that the two options do not work together.
Use the Groups subsection if you have groups in the selected list.
In Fields, match Mailchimp fields with your form fields. If you have required fields in Mailchimp, it is necessary to match them with the corresponding field on your form. For the integration to work properly, we strongly recommend making the form field required as well.
Lastly, use the Error Handling subsection to set the email address that will be informed of any errors that might occur upon submission.
Due to security reasons on behalf of Mailchimp, you cannot embed online forms in email marketing campaigns. Therefore, we recommend you add the link to your form in the email template, if you want to send it to your subscribers. Embedding forms in any email represents risks and there are very few services that support it, not to mention that there is a high chance end users will not be able to complete the form within the content of the email, as a reply.
Pro Tip: You can enable multiple Mailchimp integrations on the same form.
Similar Articles
Frequently Asked Questions
Here is a list of the most frequently asked questions. For more FAQs, please browse through the FAQs page.