How to Set Up an Online Booking System

Do You Need An Online Booking System?
Without a trace of doubt, the world has changed quite a lot and in a pretty short amount of time. In a matter of weeks, countries have literally shut down the vast majority of their activities and went into quarantine with the purpose of guarding their citizens (and health systems) against the Covid-19 threat.
As a result, businesses of all kinds have had to adapt quickly to the changing landscape. The luckiest were already able to continue their operations remotely. The others had to find new ways to keep in touch with their customers and keep their businesses going. And here’s where booking systems have captured more attention. Because you can use a booking system for a variety of scenarios, such as arranging online appointments, setting up an online class, and more.
Setting Up a Booking System with 123FormBuilder
123FormBuilder is an online form builder that can be easily used to create your very own booking data management system without coding.
The guide here is the first of a longer series we’re putting together to help businesses move their activity online. We will start with how you can take online bookings for businesses and institutions such as schools and educational institutions were among the first ones to close. If you would like to learn more about moving your activity online, so make sure to hit the subscribe button at the end of the page and stay tuned for more information – we’ll be posting one of these each week to help businesses from a wider array of circumstances.
So, without further ado, let’s jump right into the topic of the week: how to create an online booking system the easiest way possible.
Learning the Basics on the Free Plan
Even on a free plan, you can do SO much with 123FormBuilder. There is a pretty wide range of features available to free users – and although they might be limited (e.g. you can only have 10 fields per form, 5 forms, and 100 submissions per month), they will still provide you with a good array of options.
The entire form builder was created to be easy to work with. The principle is simple: you add fields by clicking on “Fields” from the blue sidebar (first button is “Fields”) adjust form settings (such as conditional formatting, payments, products, and notifications) the left hand sided sidebar (with blue icons)
The example in this section is created entirely using our free plan, to exemplify how you can use it to take online bookings. More specifically, we imagined an online school that offers three main courses: Advanced Math, Modern English Literature, and Chemistry and created an online registration form to suit this purpose, as follows:
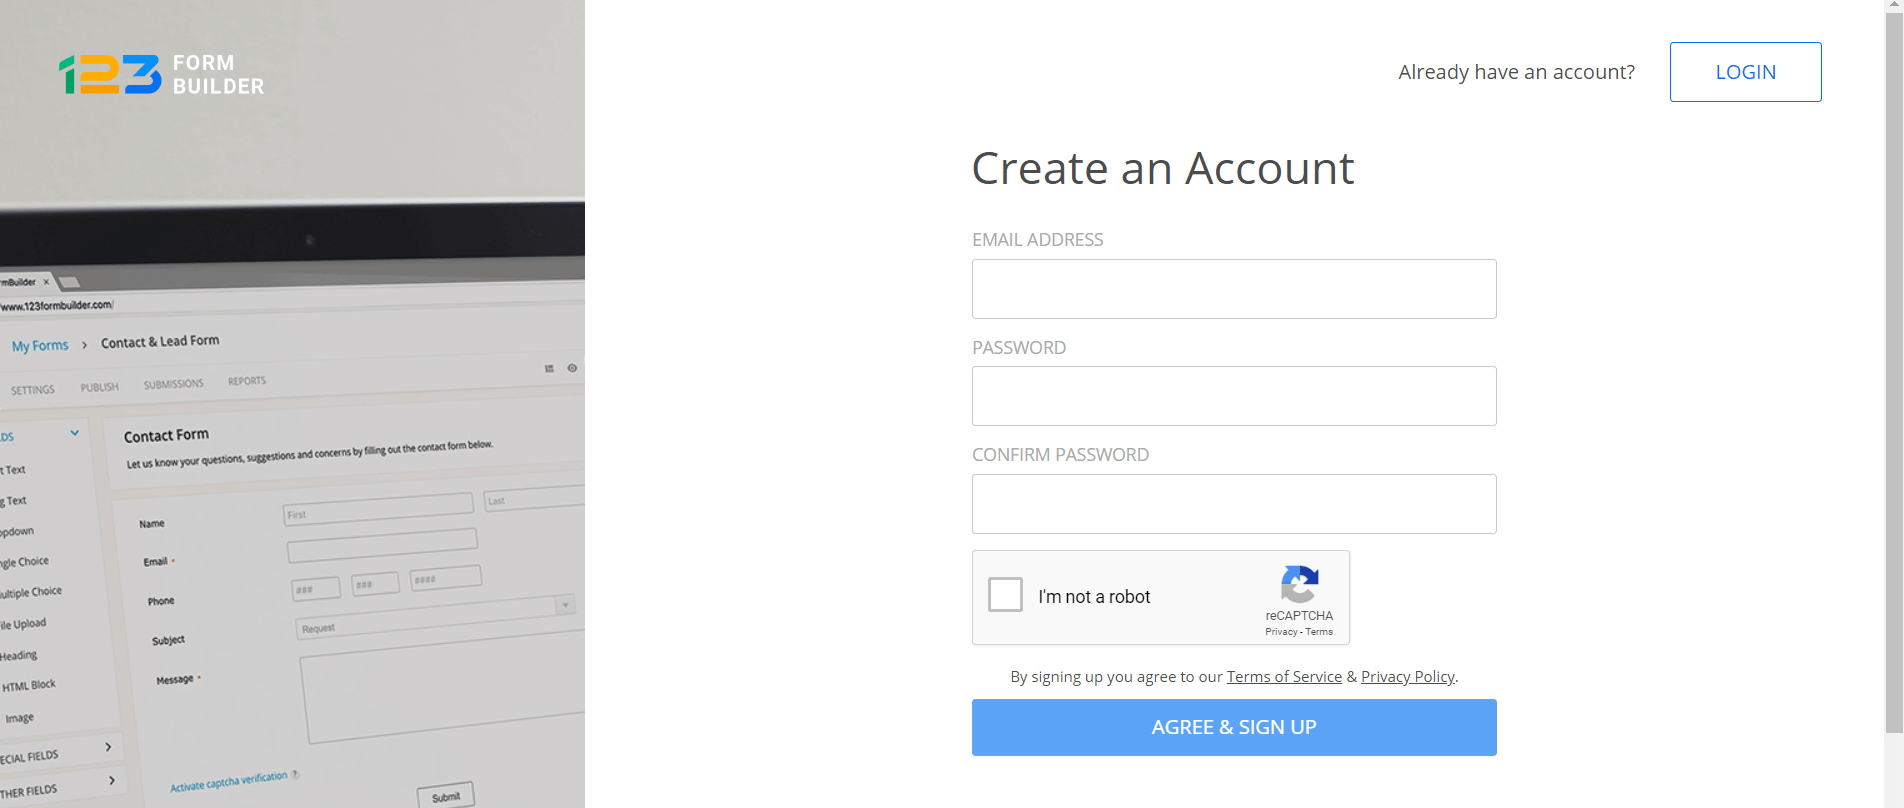
1. Create your 123FormBuilder account and sign in.

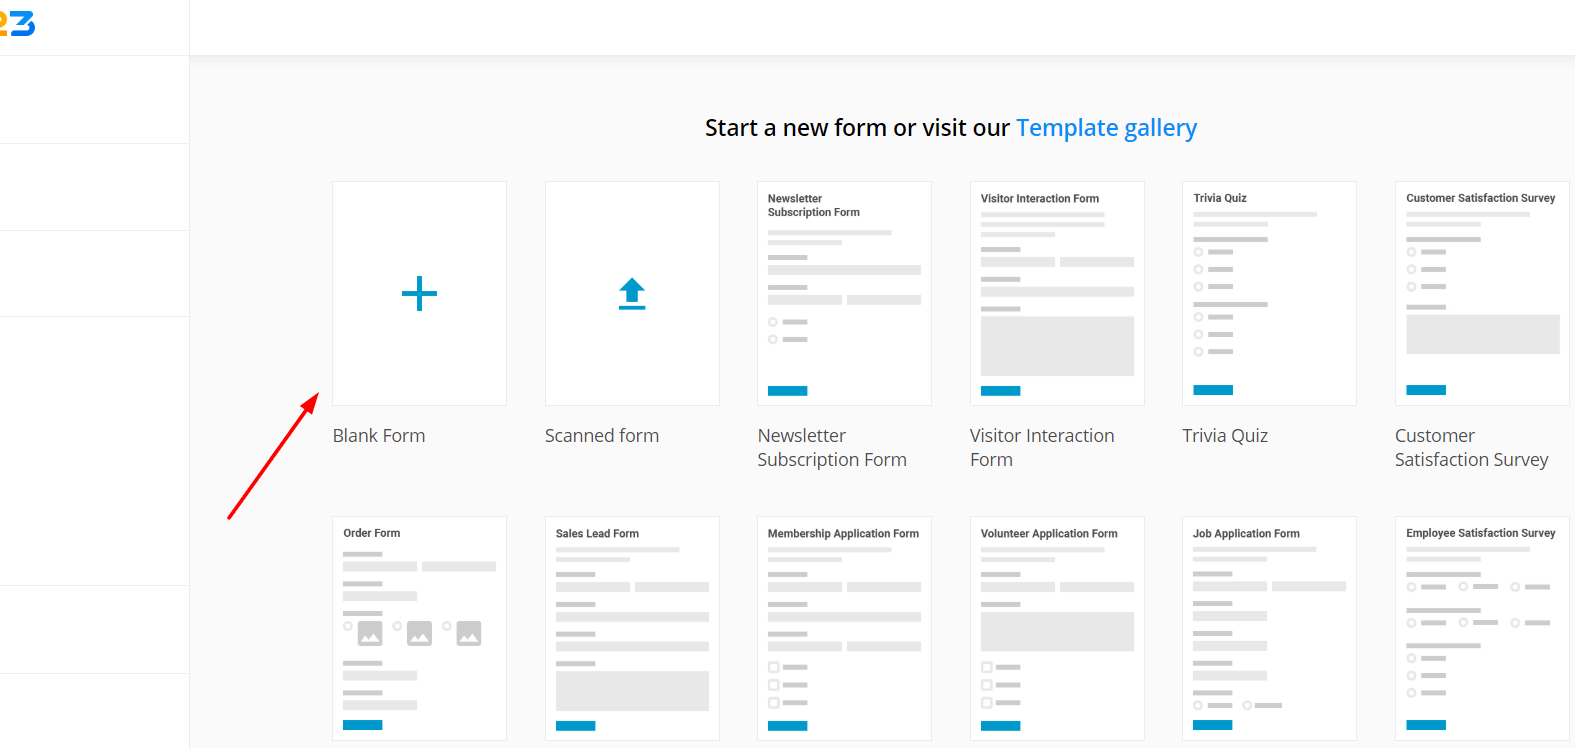
 2. Click on “New Form”, then on “Blank Form” (to create a new form from scratch)
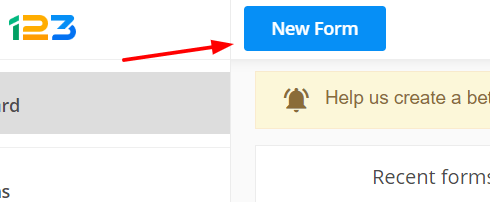
 3. Start adding fields by selecting them from the left-hand bar or by dragging and dropping them into the form. We added a few personal information fields, as you can see in the image below. 4. Add a multiple-choice field to allow future students to select the course they want to enroll to.
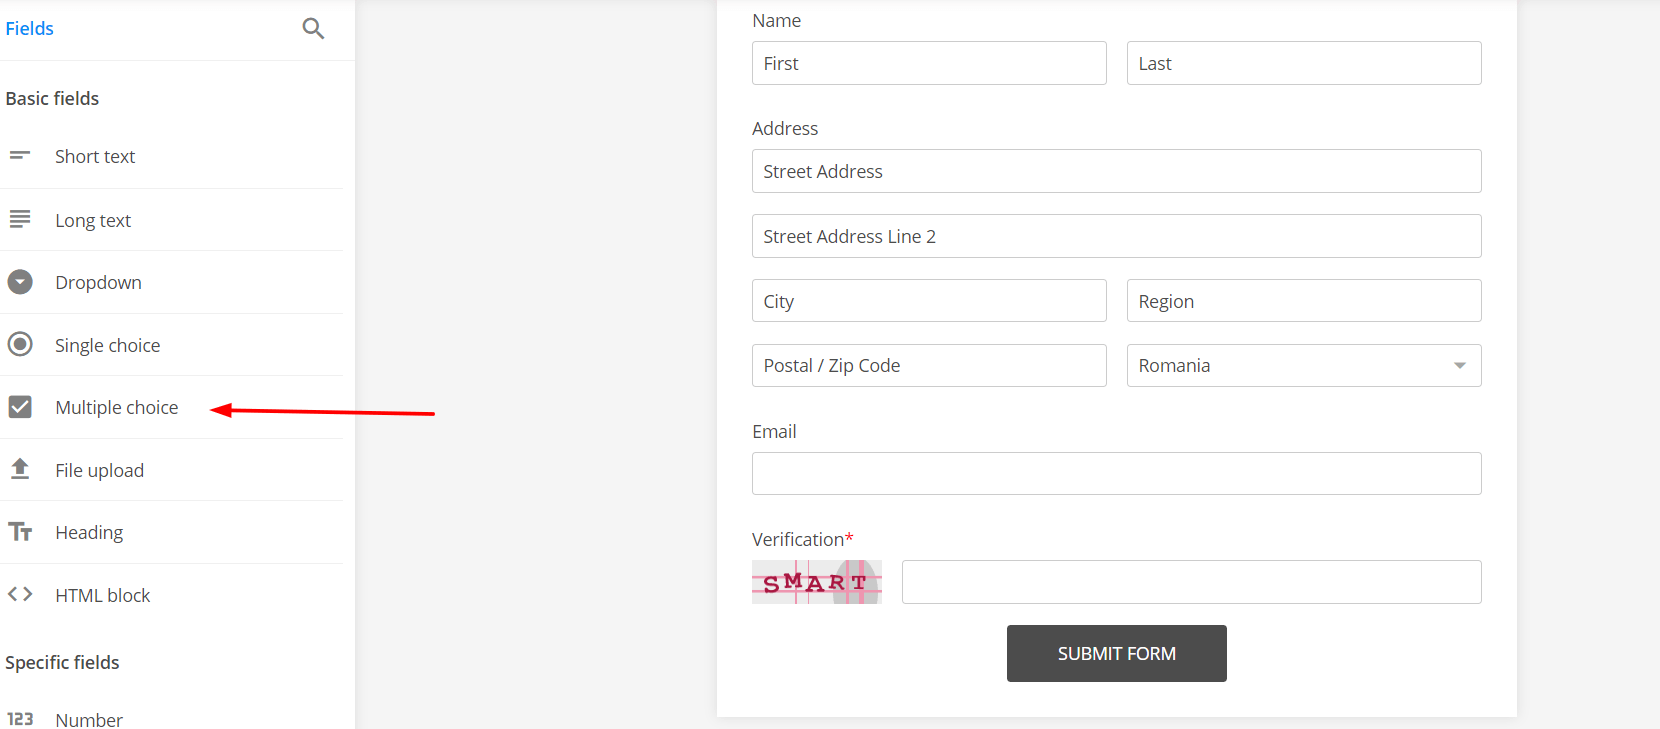
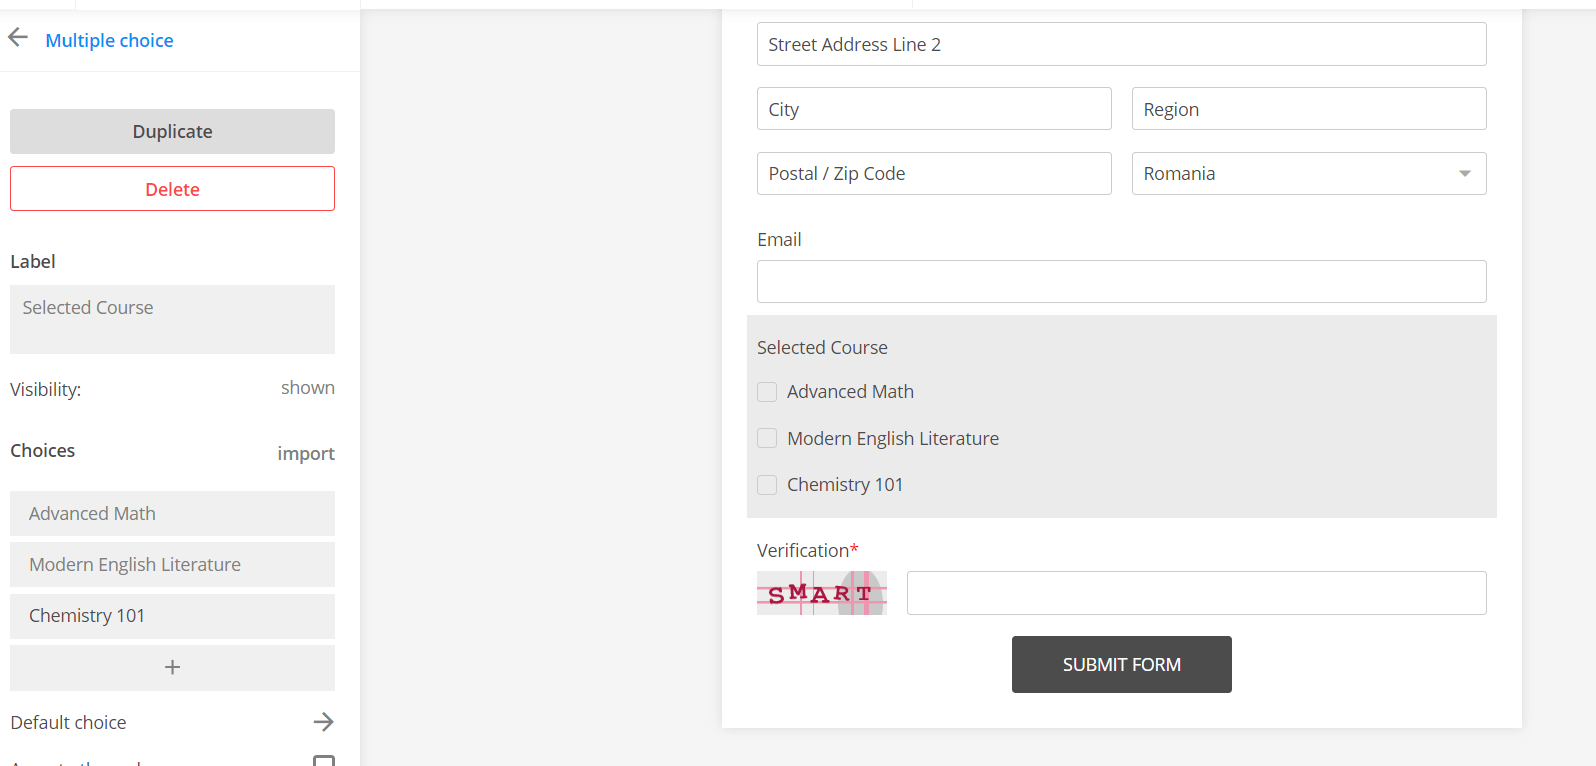 Multiple-choice fields enable you to create a list of options for the user to choose from. You can set this up to only allow one or a certain number of options to be selected, you can add an open-end option (to enable users to add their own answer), and you can use this field as a quiz as well. When you click on this field in the form you’re creating, you will see a menu in the left-hand side of the screen – this is where you can make all the adjustments you need to make on your multiple-choice field. Optionally, you can also add a Single-Choice field. For instance, your courses might be grouped based on age. In this case, you have to select the single choice field option from the form builder’s “Fields” menu, and adjust it according to your needs. Here’s an example:
 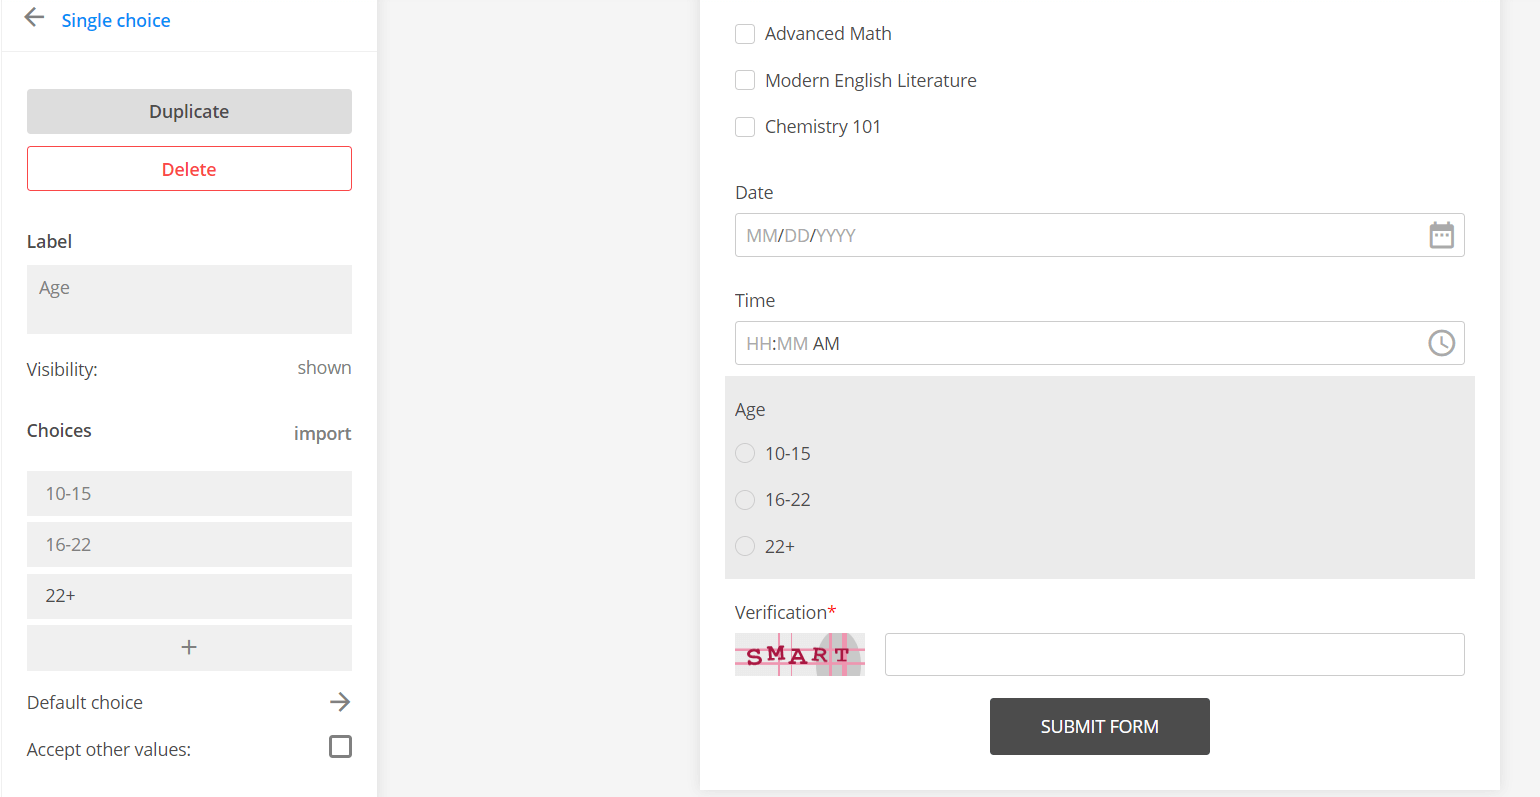 If you prefer this to be a drop-down option, you can simply add a “Dropdown” field and adjust it as per your needs, as you can see in the screenshots below:
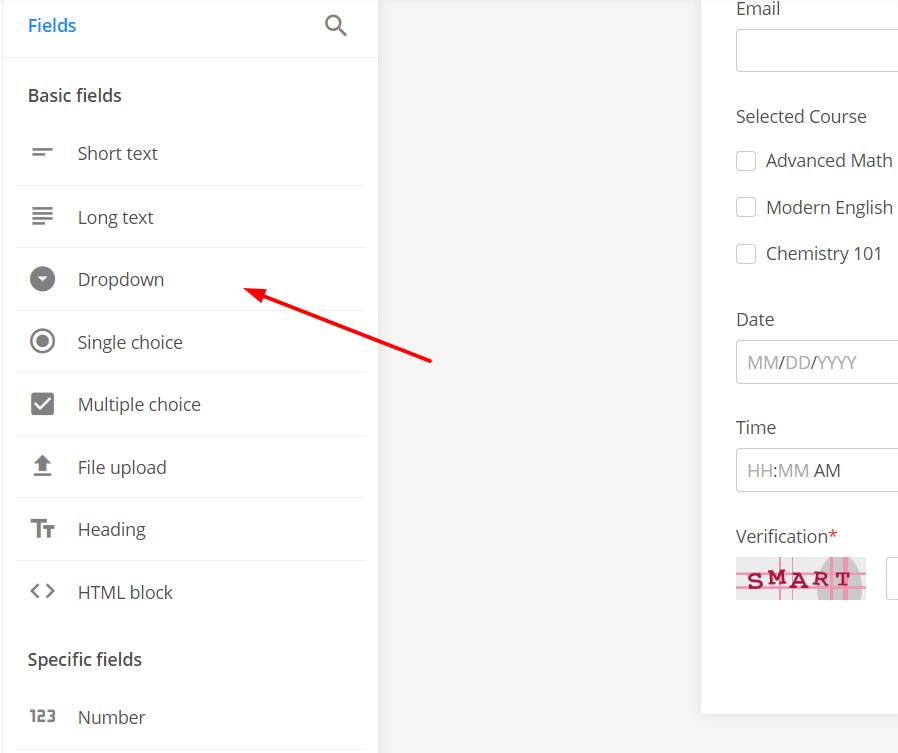
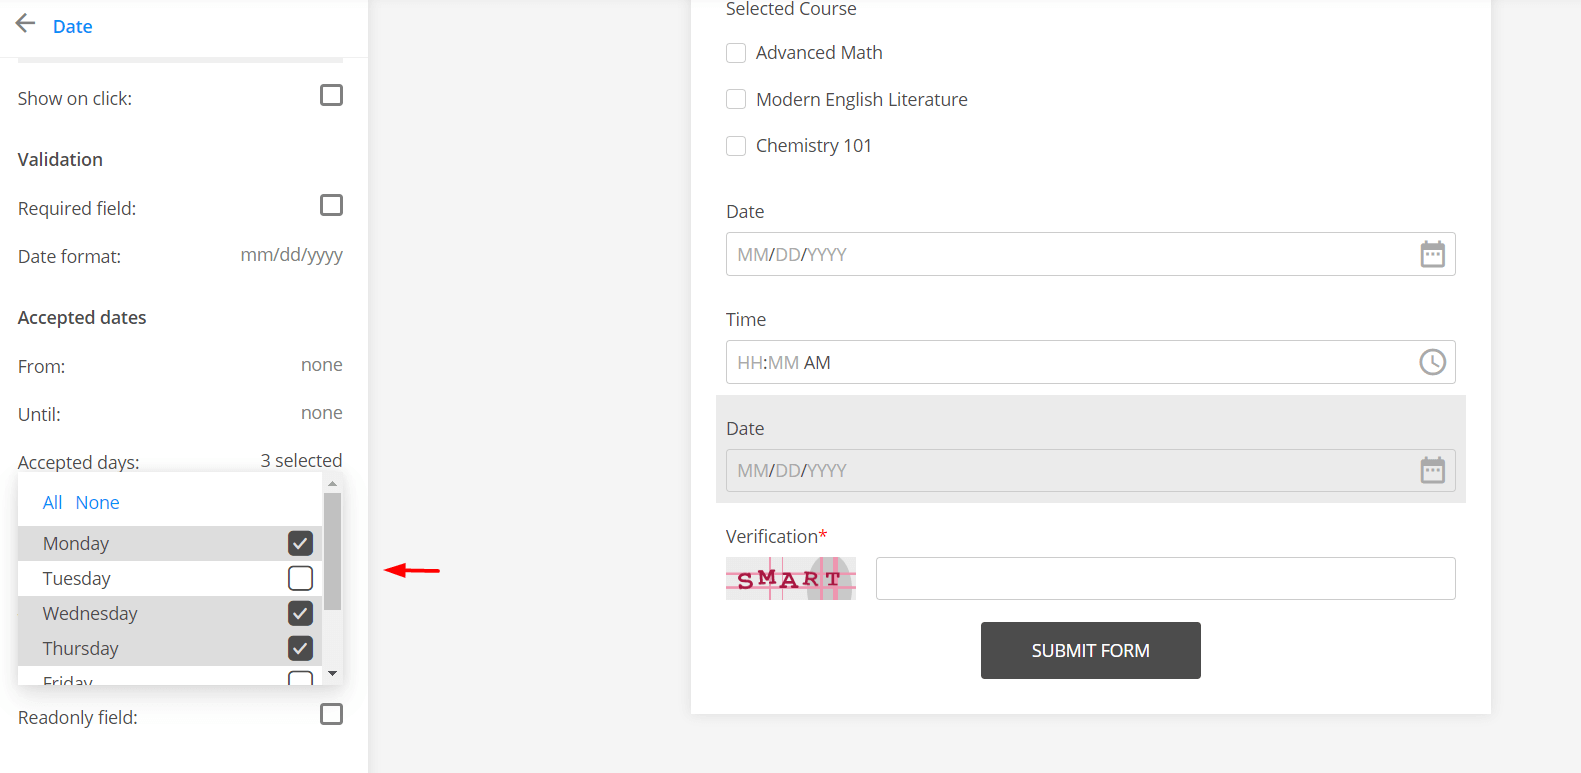
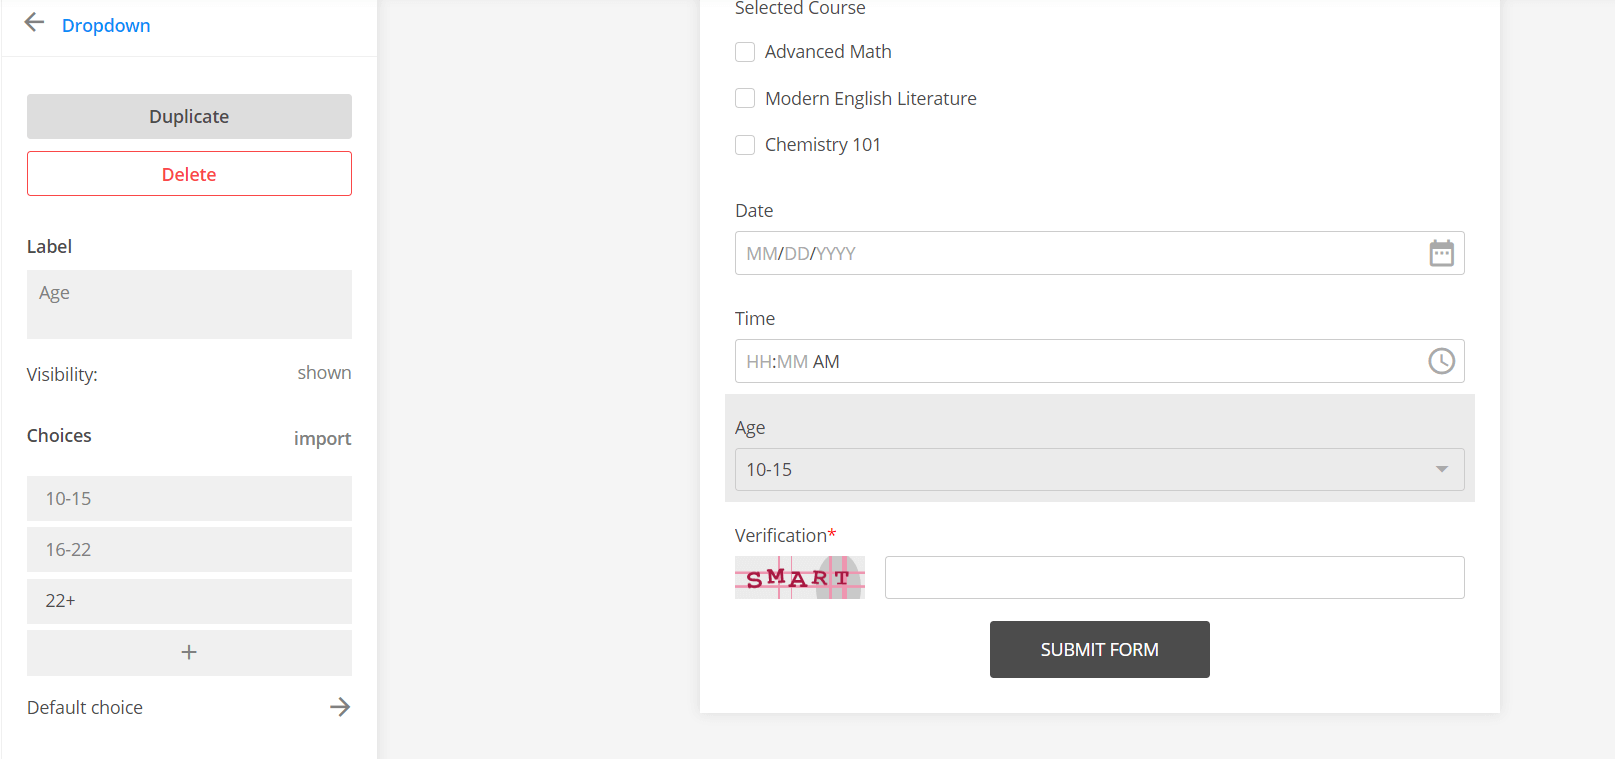 Both the single choice and the dropdown fields have the same features as the multiple-choice one, so you can adjust them according to your preferences and needs. 5. Add a date field to allow them to select their preferred date for the online course. You can adjust these fields from the left-hand bar that will appear when you click on the respective field in the form. For instance, we thought our teachers would only be available on Monday, Wednesday, and Thursday – so we selected these days from the “Date” menu.
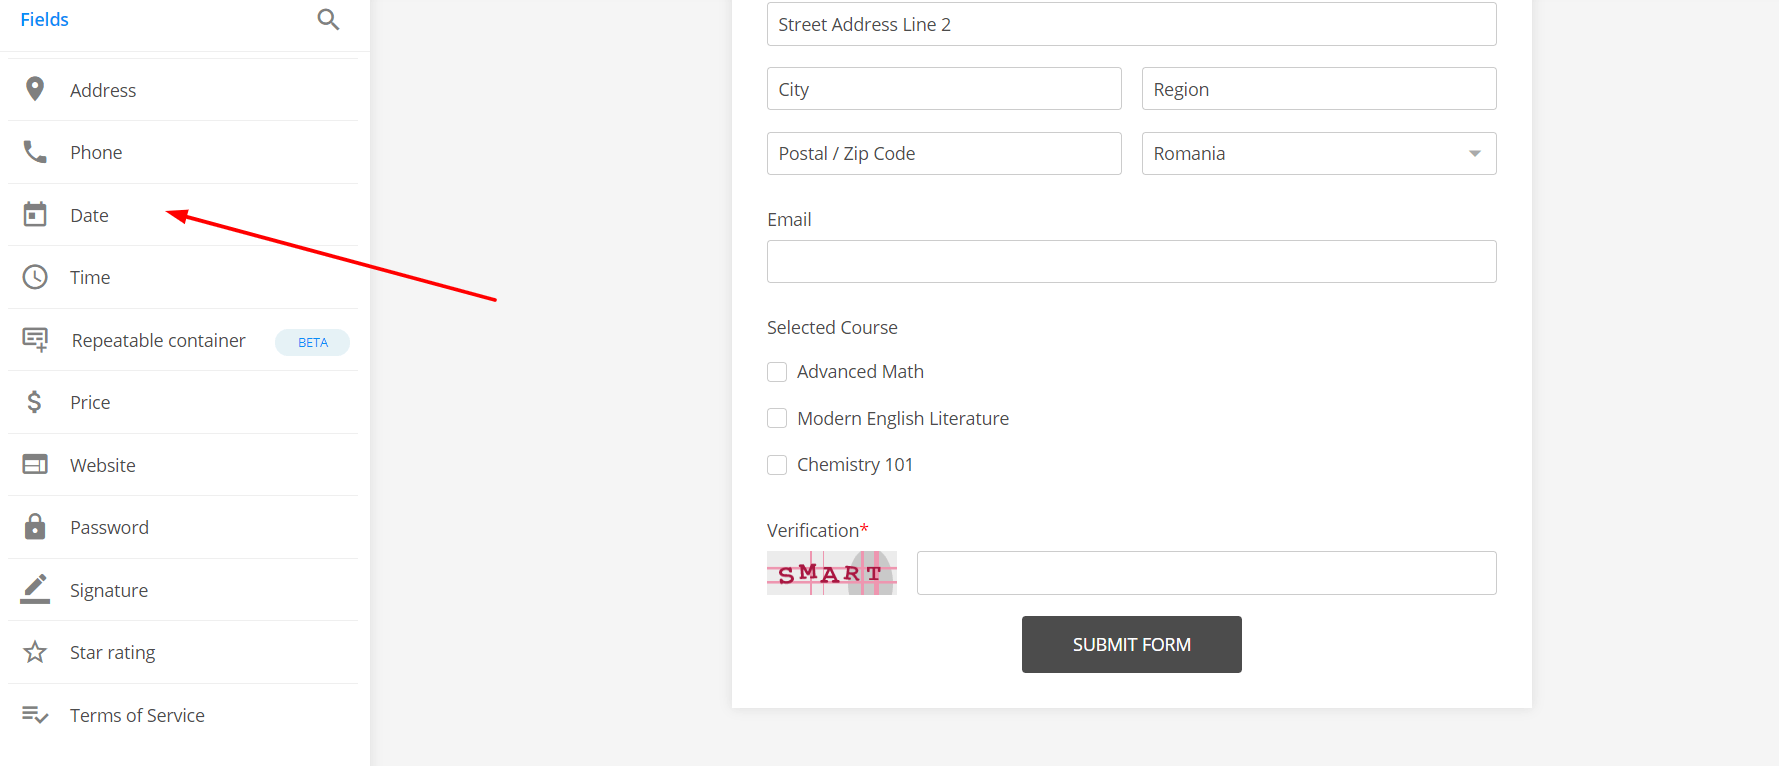
 Our form builder will allow you to add other very specific fields like the “Date” one as well. For instance, you might want to add a “Time” field, as shown in the screenshots below. You can also adjust this field according to your needs by clicking on it in the form builder (e.g. you can adjust it to show a 24-hour format, instead of a 12-hour one). Our basic form is pretty much ready by this point, but we thought it would be a great idea if both the educational institution behind it and its students would be notified by email with each submission. Fortunately, you have access to Notifications on your Free plan, and this will allow you to set up an intricate Notification system to help you (and students) keep track of the information submitted through this form. Keep in mind that one notification equals one email and that you have one email notification template available on the Free plan. To set up notifications, you can follow these steps: 6. Go to “Notifications” on the left-hand sidebar (as you can see in the image below)
 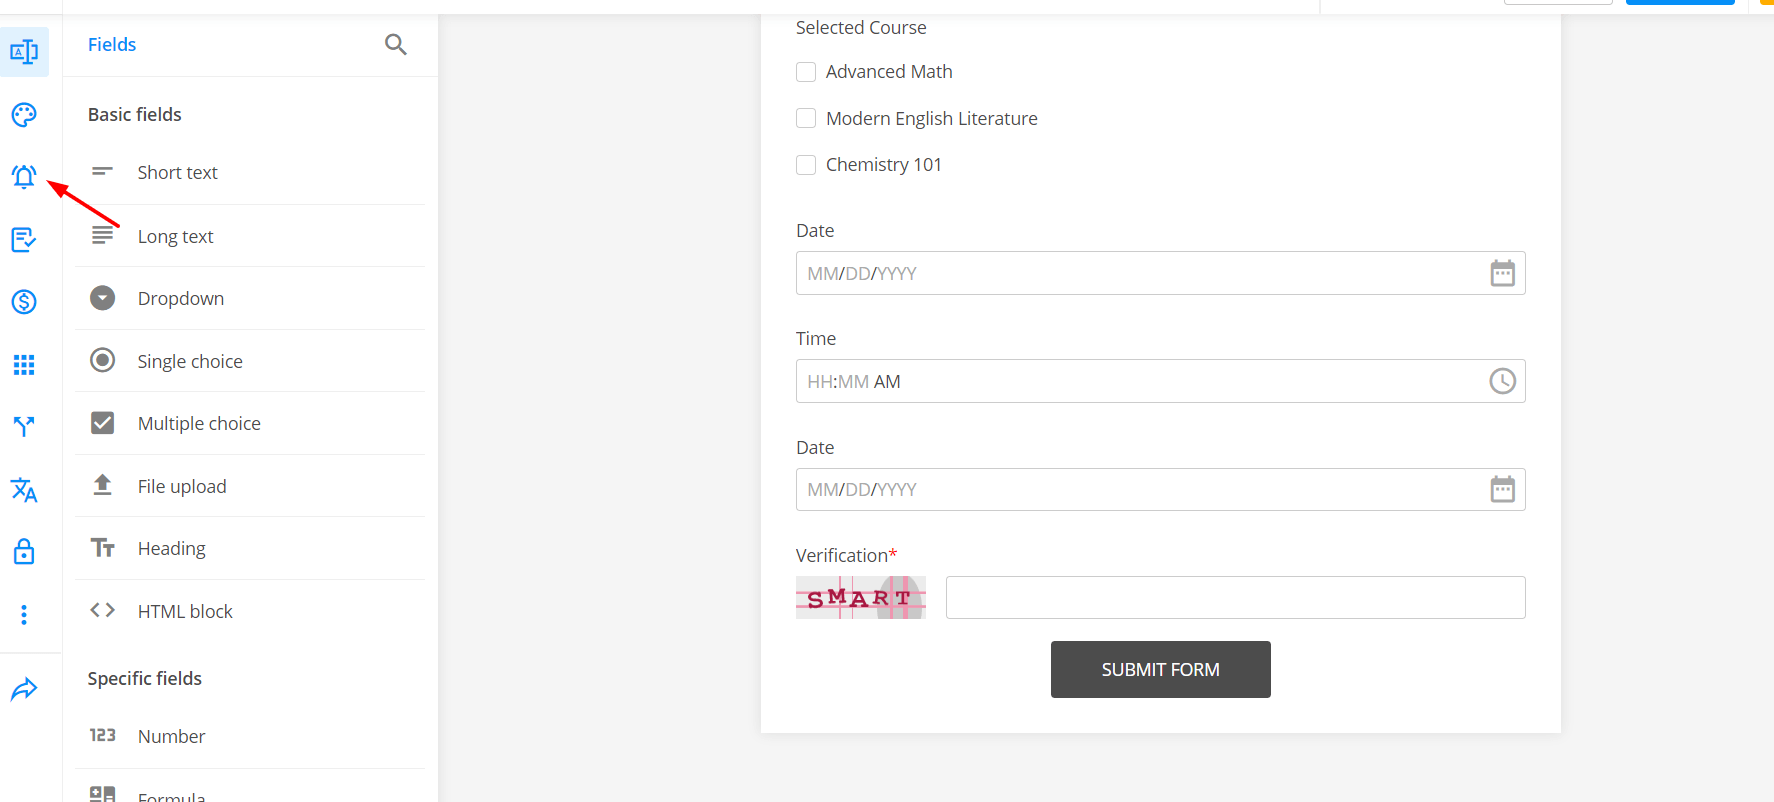 7. Set up your notification. To begin with, we set up a notification email the course provider would receive each time someone sends in a form. Of course, you can adjust when this notification will be received by clicking on “Add Rules” on the top right button and setting up your rules (e.g. to receive notifications only when a certain course is picked from the drop-down list)
 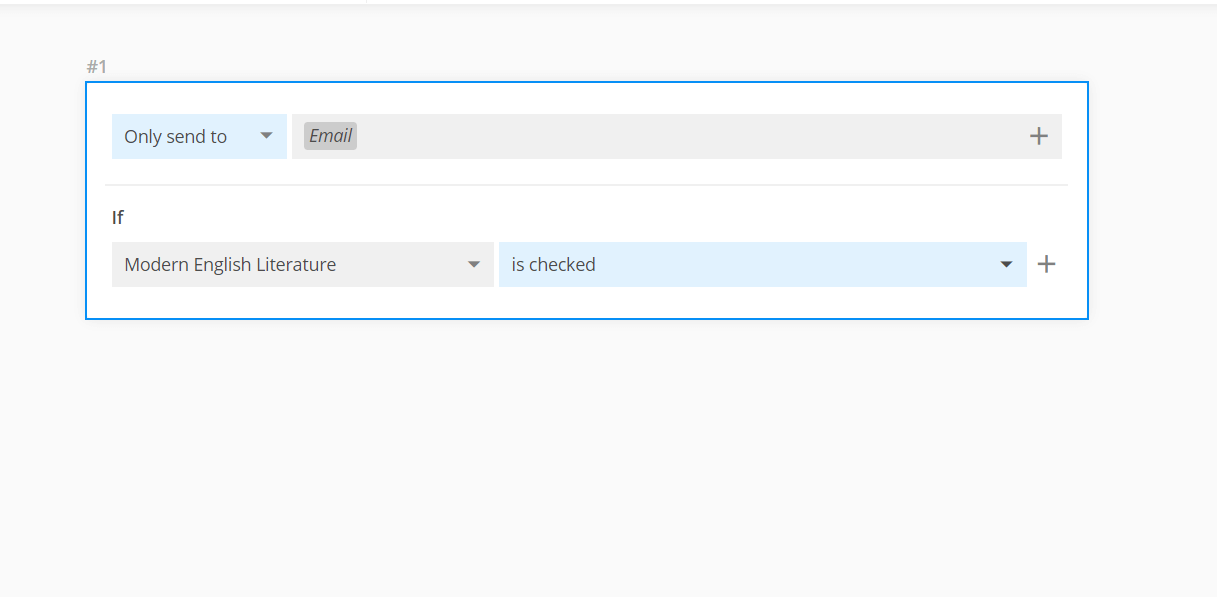 This is how your email notification will look like:
 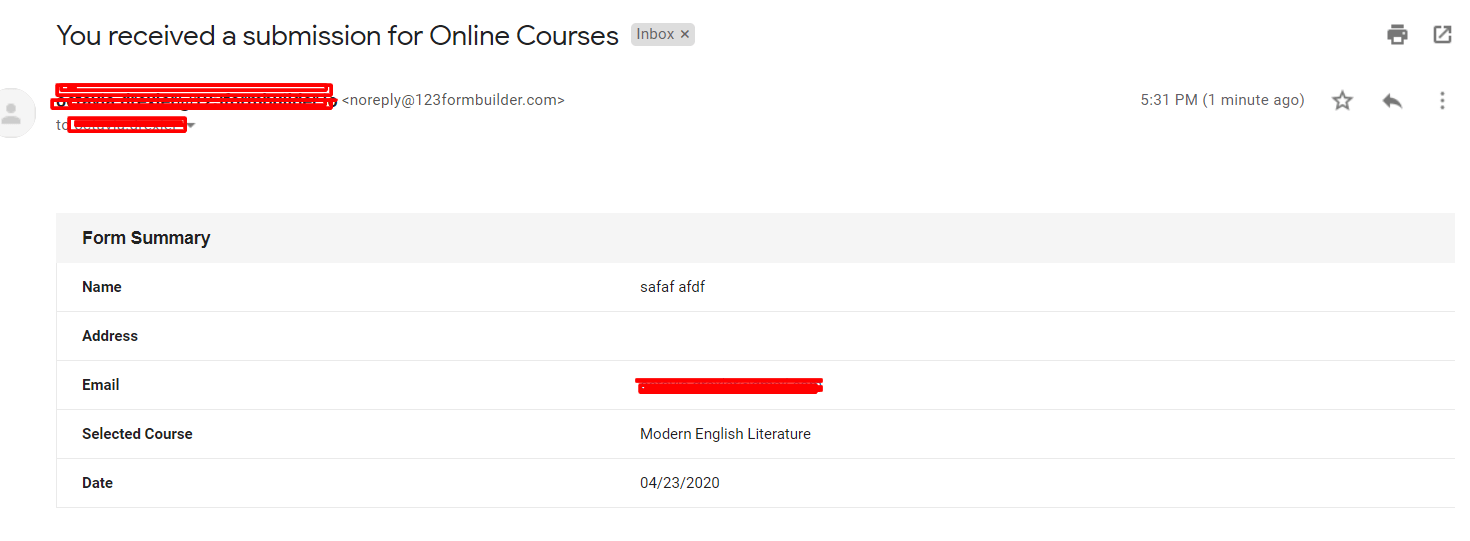 8. Next, we set up a notification for the user. To do this, you can add a “New Email” from the menu on the left of the screen and select “Email” instead of “My Email” in the notification setup. Keep in mind that much of the notification setup is based on a series of variables. These variables will pull information from the form to customize the entire setup. For instance, here are some of the more commonly used variables:
- “Email” refers to the email address of the person filling in the form
- “My Email” refers to your email address (the person creating the form builder)
- “Name” refers to the name entered in the form
- “Address” refers to the address entered in the form
… And so on. These variables can be used by clicking on the “+” sign at the top right hand side of each field (“To”, “Subject”, respectively “Body”). For example, you can also use the same variables to personalize the message you send to the user, as you can see in the screenshot below. 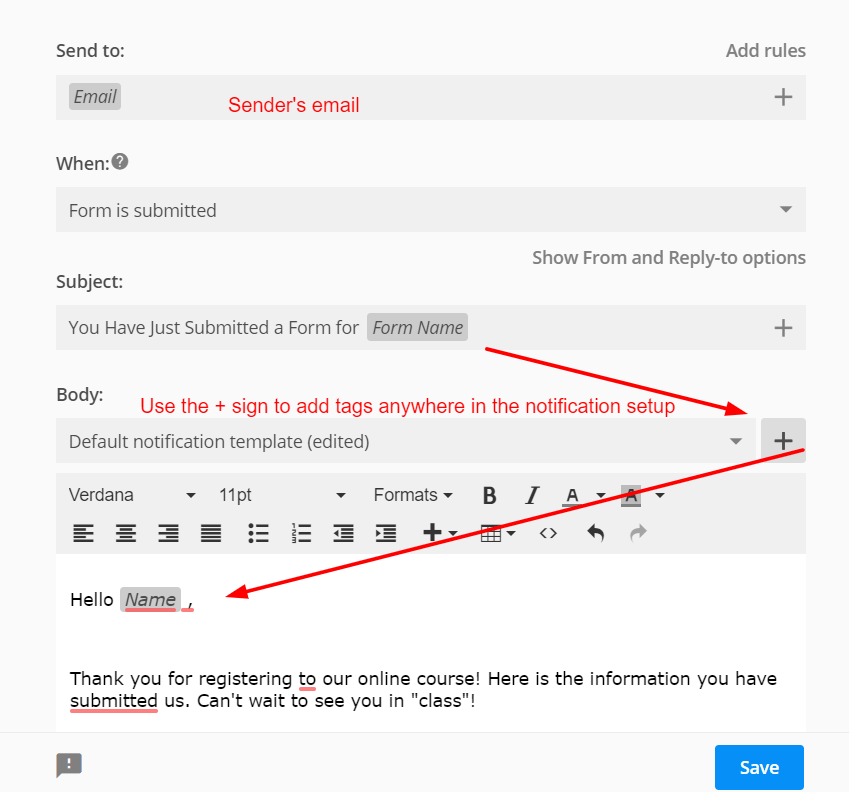 This is how the user’s email would look like:
 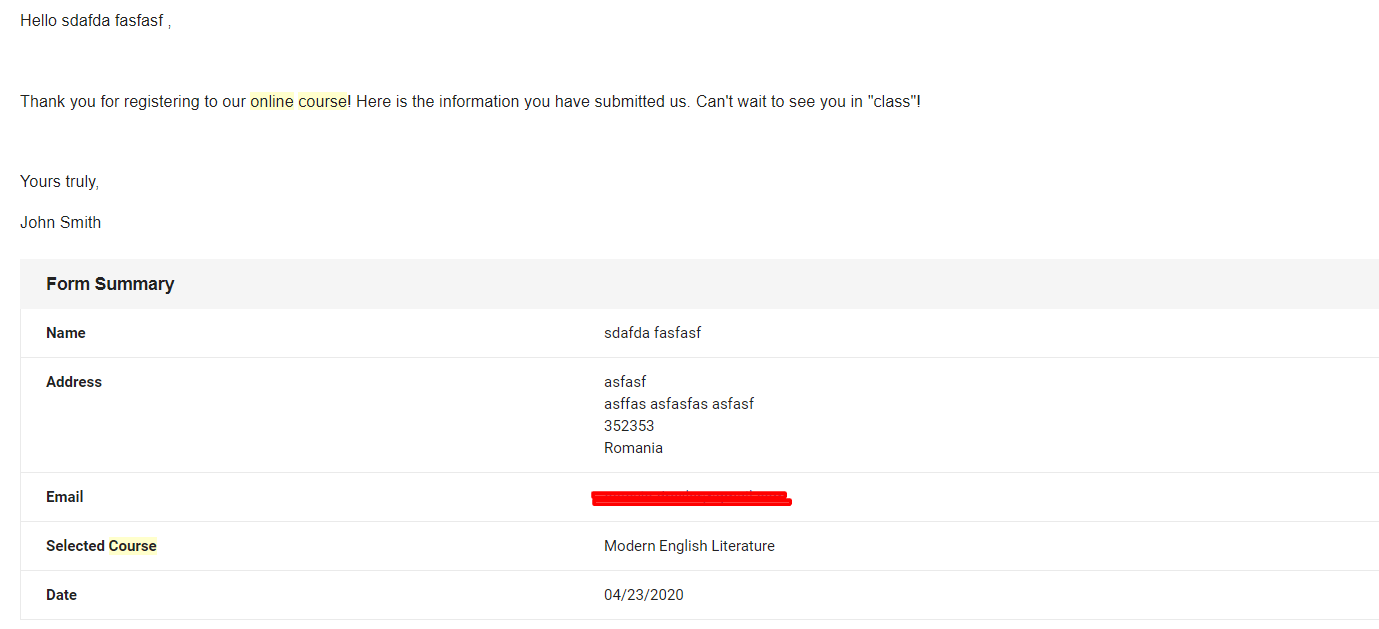 9. Additionally, you can also personalize the Thank You message the form submitter would see when they send in their information. By default, it would look like this:
  To add a different Thank You message, click on “Thank You Page” in the left-hand sidebar, as shown below:
 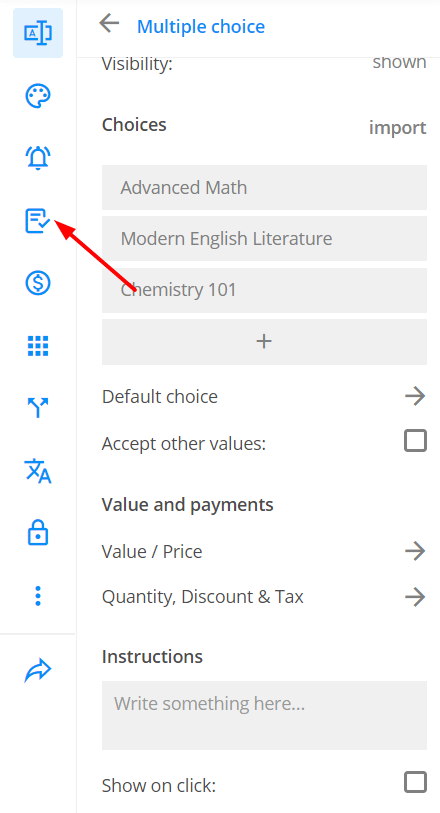 10. Customize your Thank You page as you see fit. This is what we came up with, for example:
 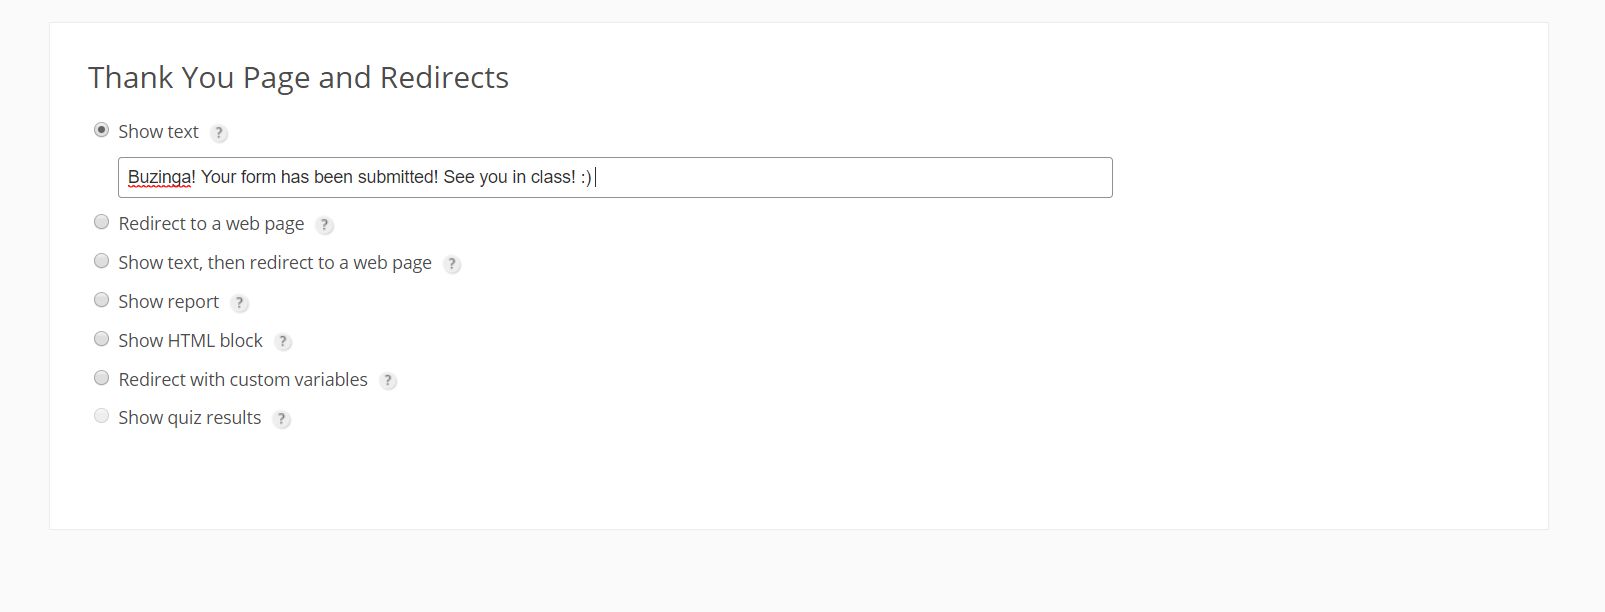 Keep in mind that you can easily customize your form’s design as well. For the purpose of this example, we picked one of the funny themes available in the Dashboard (just to show off a little). 11. Click on the little painter’s palette icon in the left-hand sidebar.
 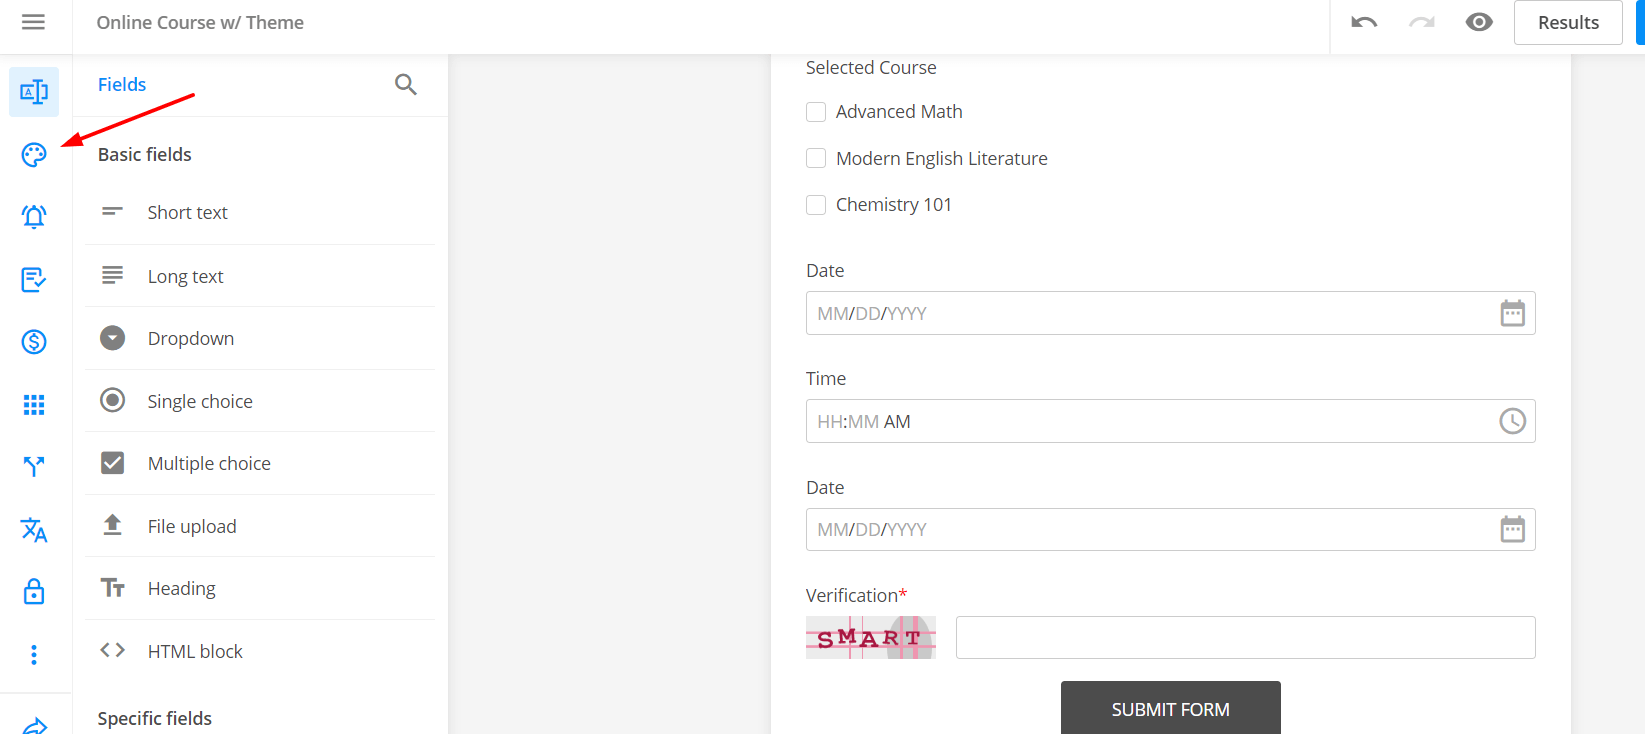 12. Click on the “Change theme” button in the left-side menu
  … And by the end of this entire process, this is what our form would look like on a free 123FormBuilder plan. Do you want to add more to your online booking system?
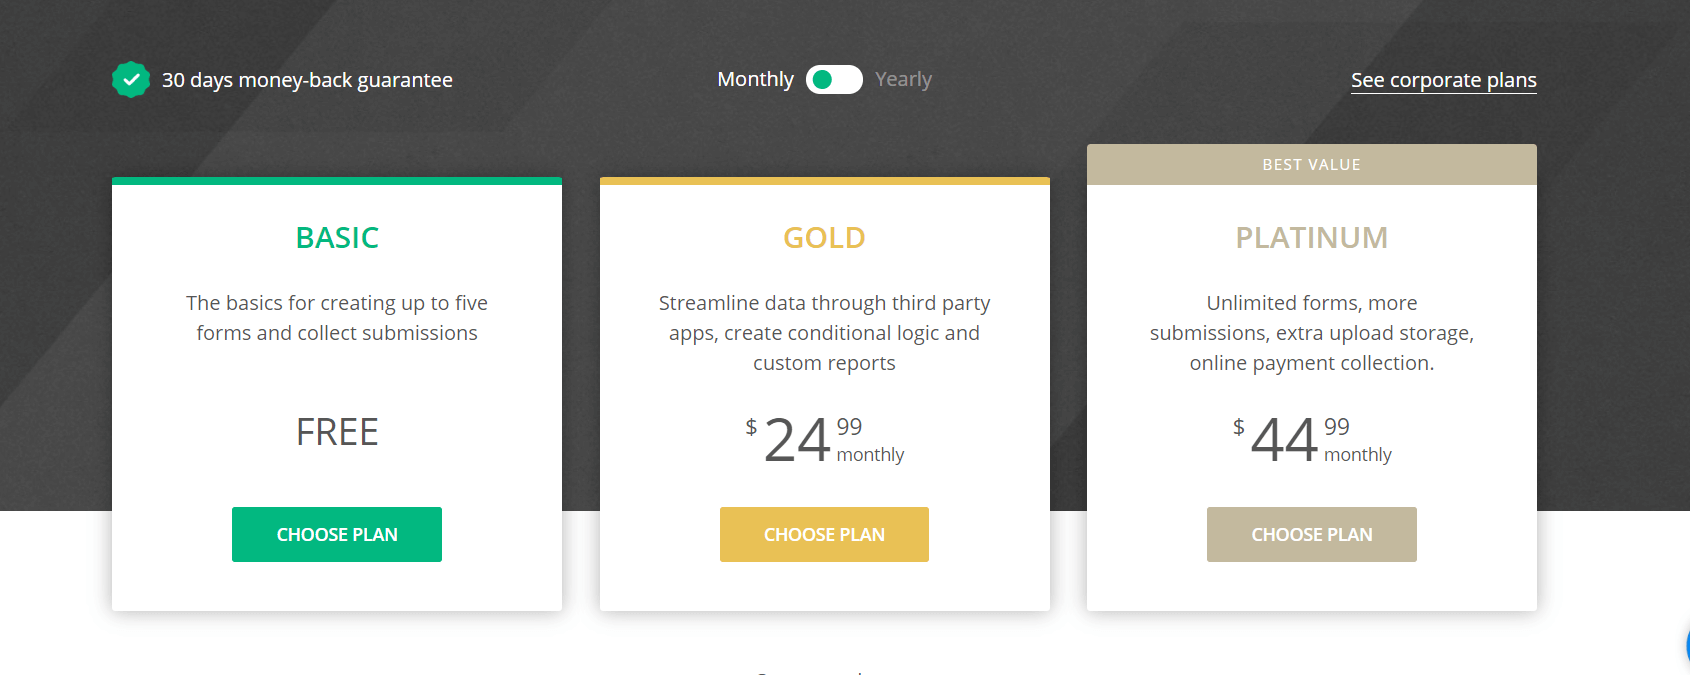
Moving Up – The Gold Plan
Our Gold plan offers an even wider range of options in terms of form customization and features. More specifically, some of the most important perks of upgrading to a Gold plan include the following:
- Unlimited fields per form
- 5000 submissions per month
- 500 MB storage space
- Unlimited notifications
- The option to add 3 conditional formatting rules
To show you some of the things you can do on a Gold plan, we will set up some advanced form and field rules, as well as add a different language (because you might have just noticed that you get a lot of students from Spain, for example). Adding rules with conditional logic is very useful when you want your form to display additional options at the click of a specific button. For instance, if our Modern English Literature course has two modules (Advanced Modern English Literature Course and Introduction to Modern English Literature Course), we can set up a rule for these two options to only be displayed when the user clicks on “Modern English Literature”. Let’s see how we do this: 13. First, you will have to add a new set of multiple choices by following the same path as described earlier in this guide. Ours looked like this: 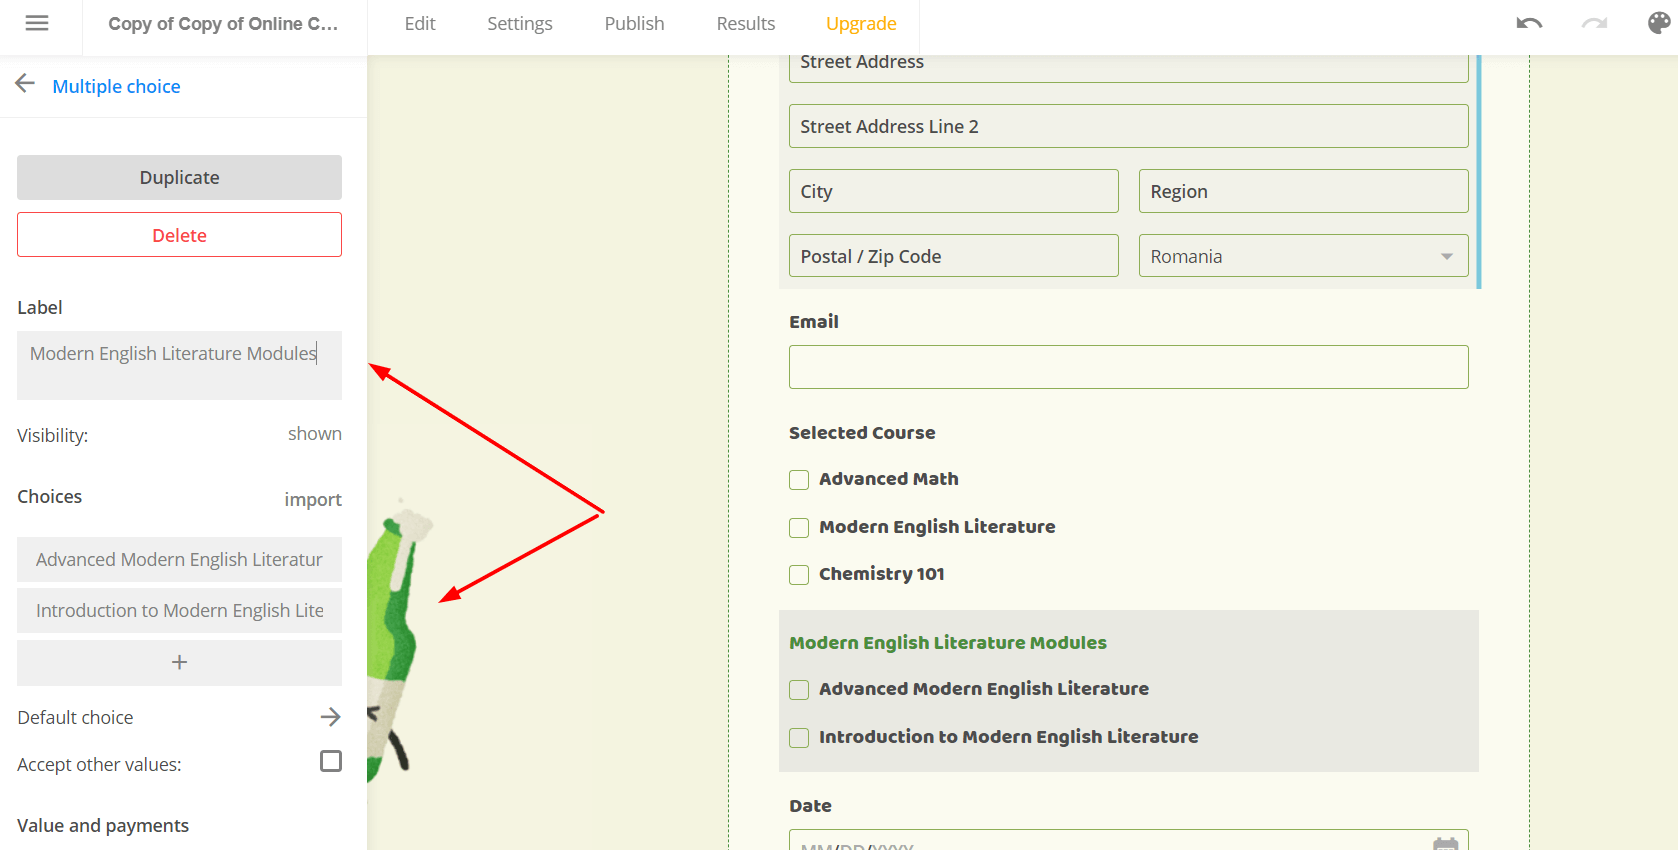 14. To set up a rule, go “Rules” on the left-hand sidebar.
 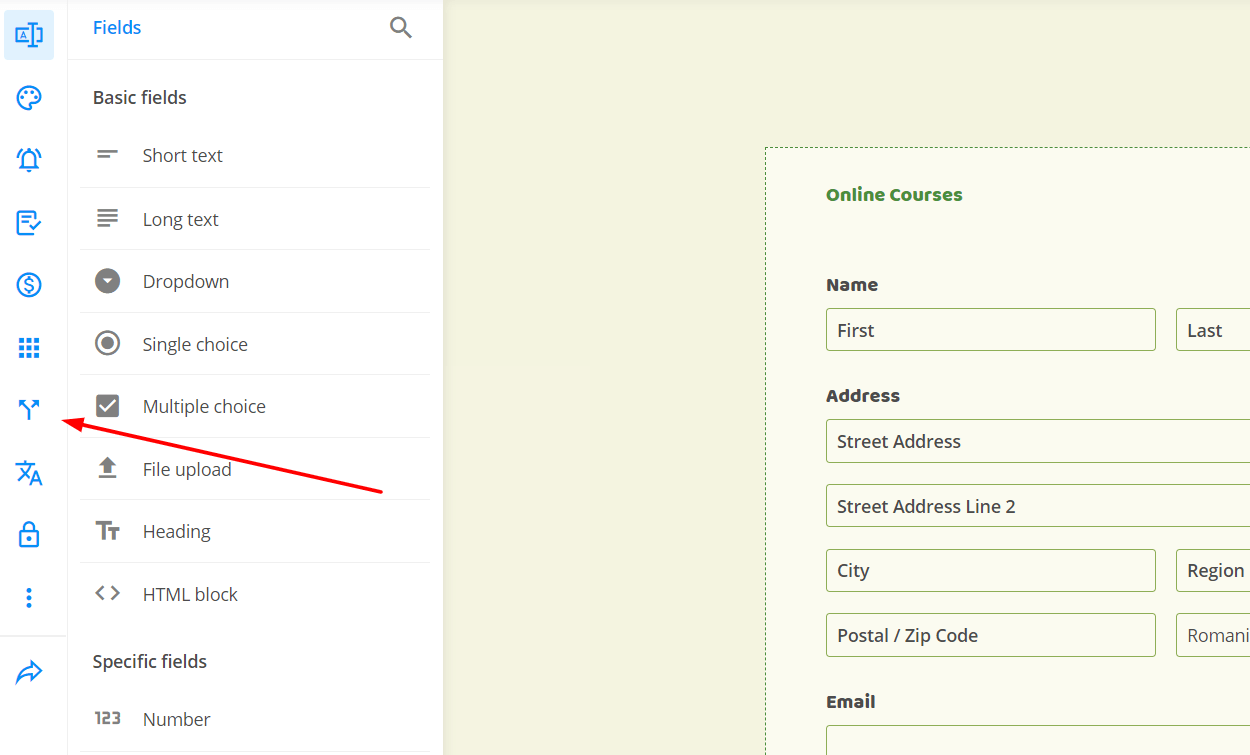 15. Tick the “Enable field rules” button and click on “Add rule”.
 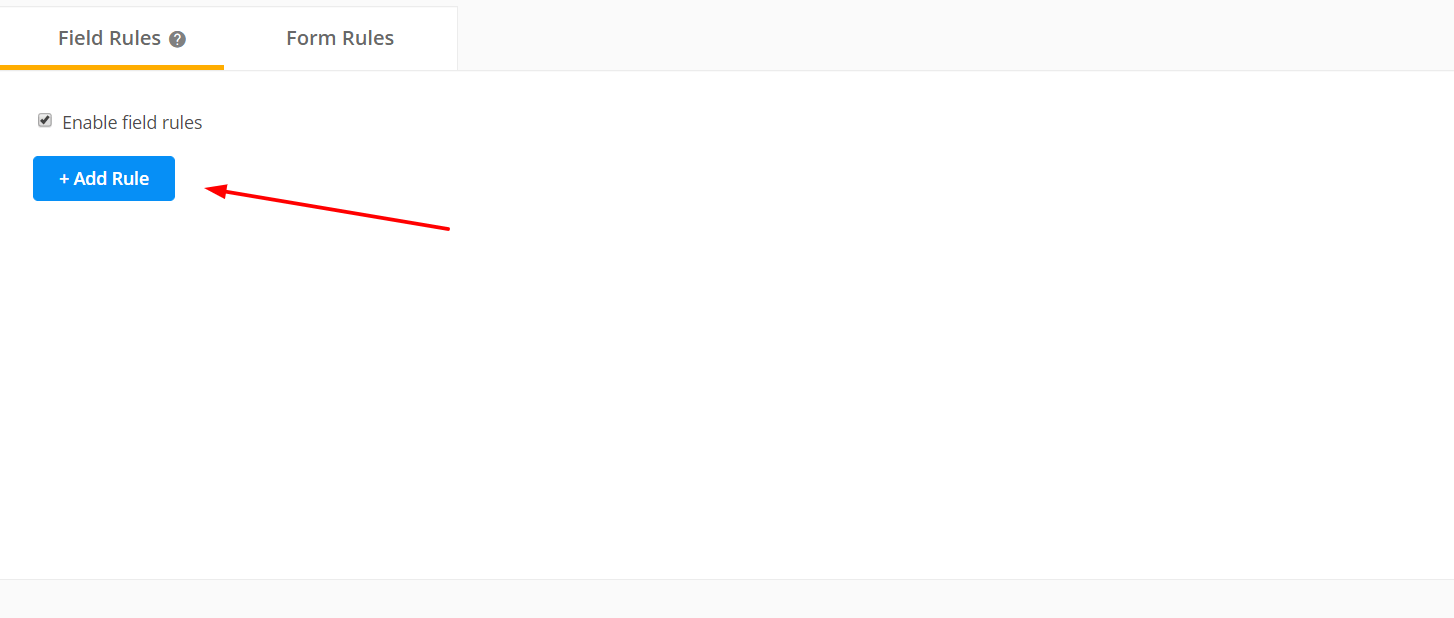 16. Conditional logic rules function on the IFTTT model (if this, then that). As such, we selected IF “Modern English Literature” from the drop-down menu on the left and we selected “is checked” from the drop-down menu on the right, as shown in the screenshot below, and then we clicked “Continue”.
 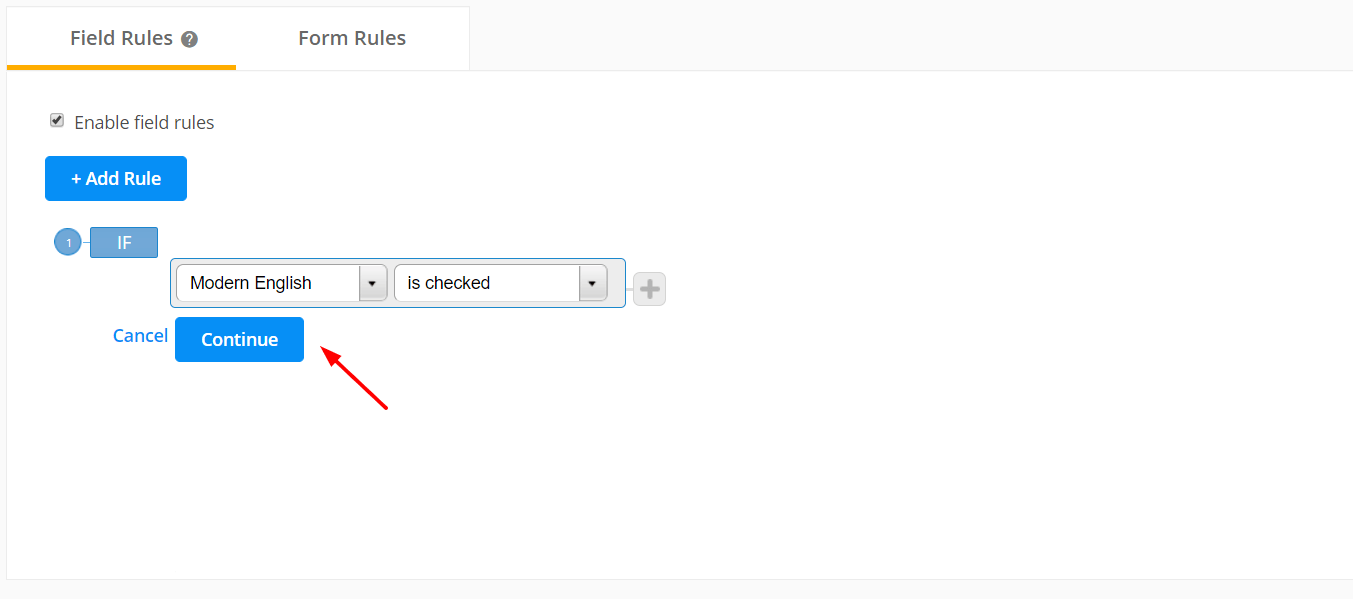 17. Under “THEN”, we selected “Multiple Choice” (we did not rename the second multiple choice field, so this is how it appeared for us – but if we had renamed it, we would have selected the name of the new multiple-choice field).
  … And this is how the form would look in the end.
 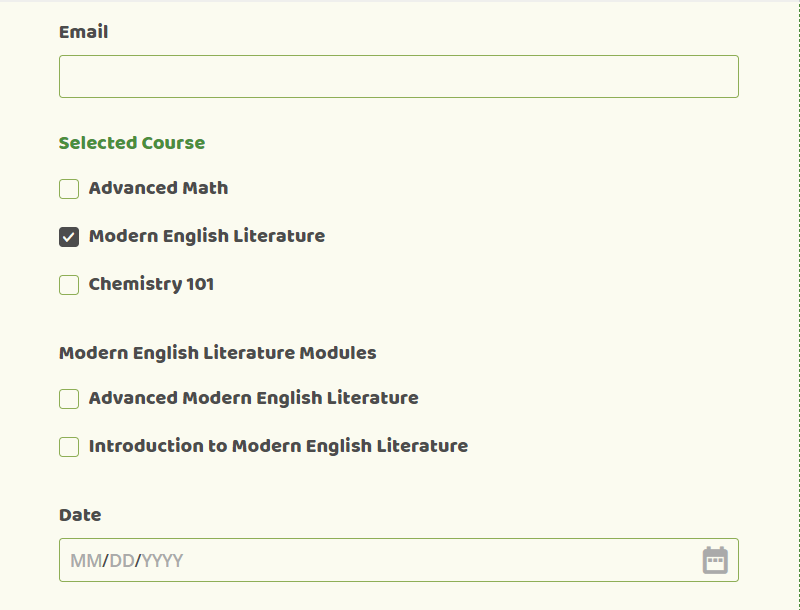 You can also link conditional logic and your notification system as well. For instance, let’s say we need some information from students if they select one of the “Modern English Literature” options. In this case, we would have to: 18. Go to “Notifications”, then on “New Email” in the left-hand menu. 19. Click on the “Add rules” button at the top right side of the Notifications setup page.
 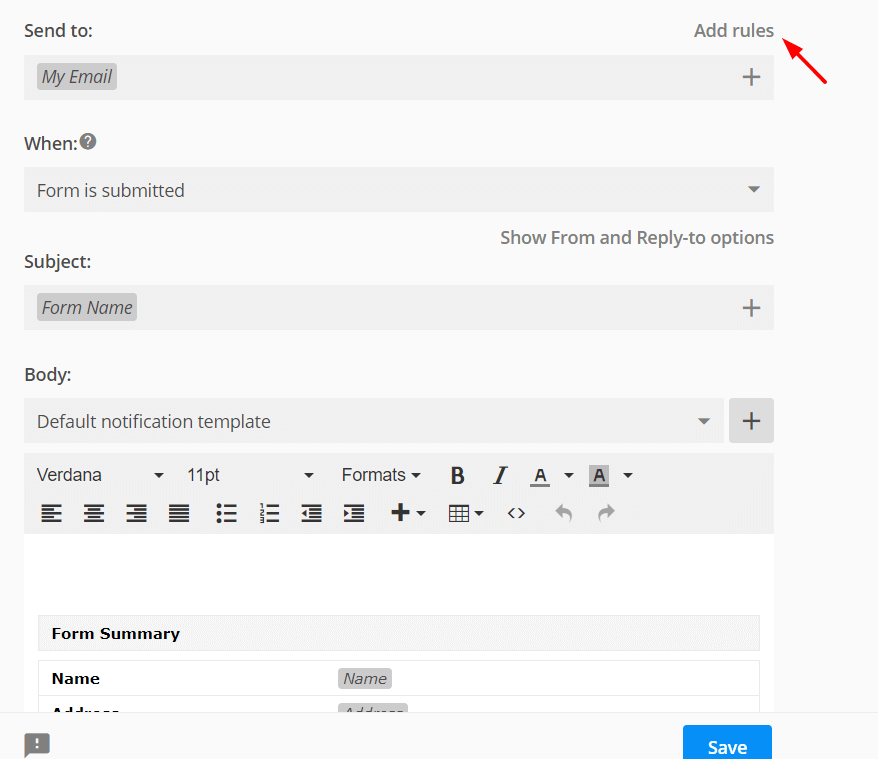 20. Set up the conditional logic rule. In our case, this meant Send to “Email” (the user’s email) IF “Modern English Literature” is “checked”.
 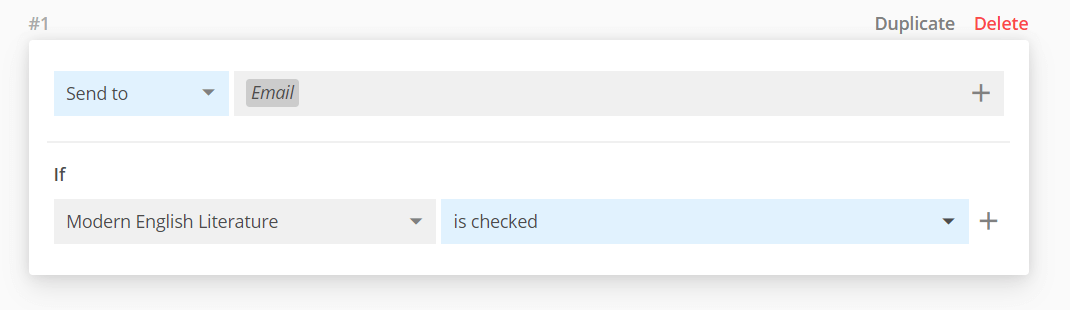 21. You can also personalize the email the user will receive when they sign up for the Modern English Literature Course (because you need information from them, right?)
 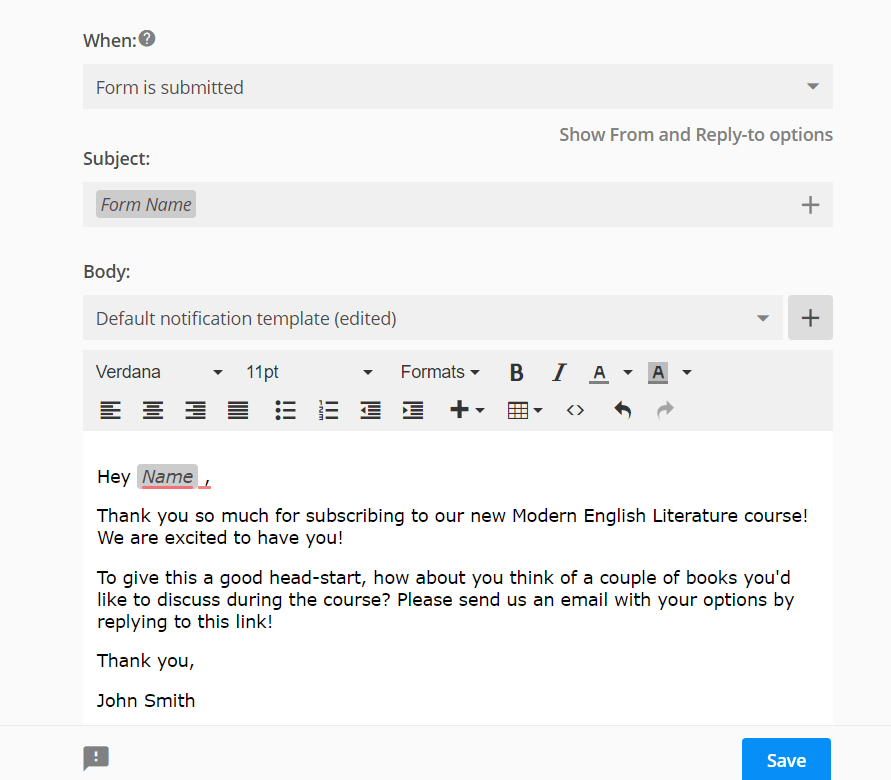 This is how their email would look like in the end:
 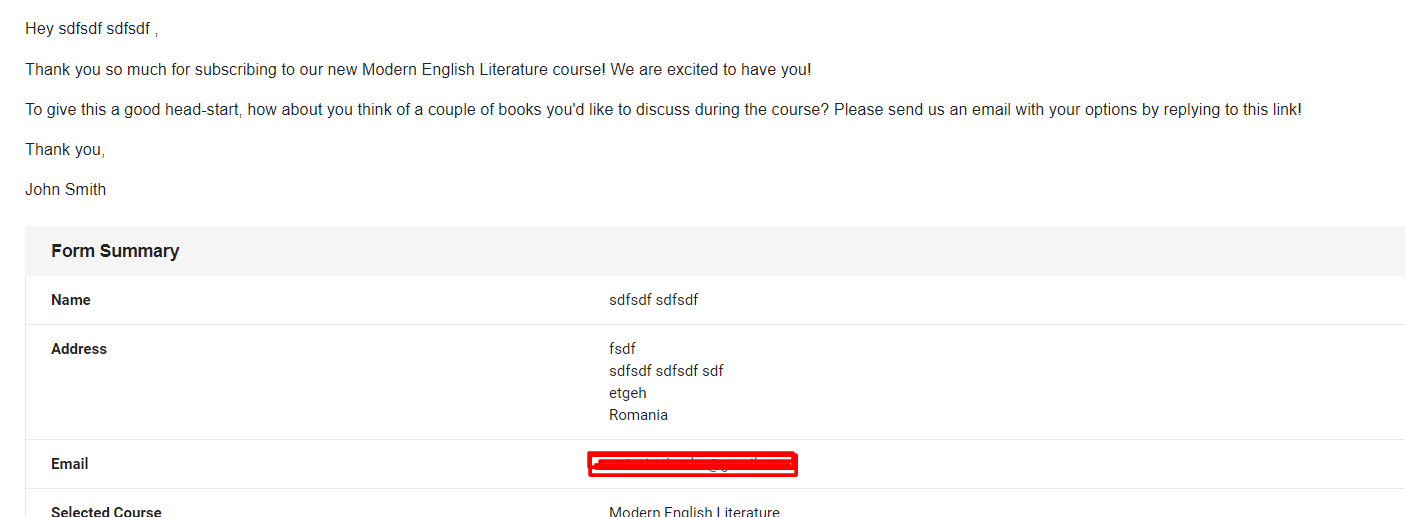 Our Gold plan will also allow you to translate your forms into a different language. You can easily do this by following these steps: 22. Go to “Translations” on the left hand sidebar.
 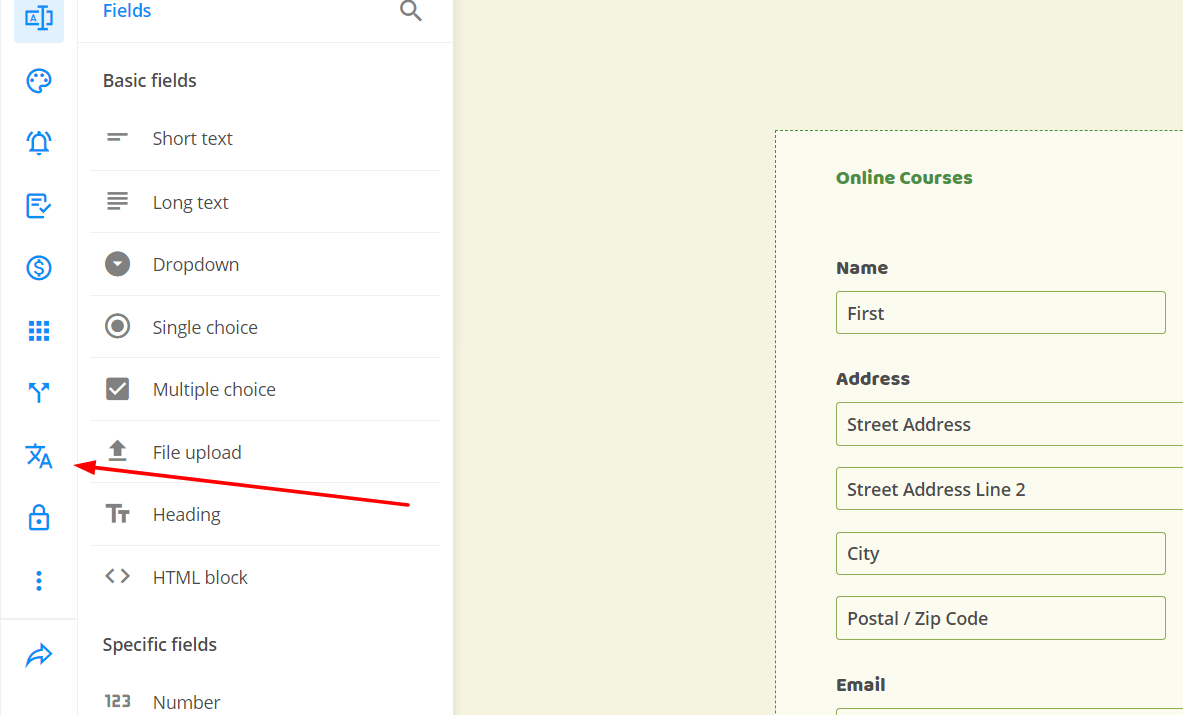 23. Select your desired target language from the menu on the left-hand side of the screen.
  …And by the end of this process, this is how our form would look like. How’s that for a booking system? Need more? We’ve got you covered.
Cash In – The Platinum Plan
If you want to upgrade to the Platinum plan 123FormBuilder offers, you will reap a long list of benefits. Some of the best ones include:
- Payment processor integration
- 20,000 submissions/ month
- 2 GB of upload storage
- Adding an unlimited number of conditional logic rules
To showcase how useful this is (especially when moving a course or a service online), we will exemplify payment processor integration in this section. Integrating any of the 19 payment processor options available in 123FormBuilder’s Dashboard is extremely easy. To do it, you will need to follow these steps: 24. First, you will have to add your products and their pricing. To do this, go to any single-choice, multiple-choice, or dropdown field you want to monetize and click on it. 25. Then, go to Value/ Payments in the field’s menu on the left-hand side of the screen, and click on “Quantity, Discount, & Tax” 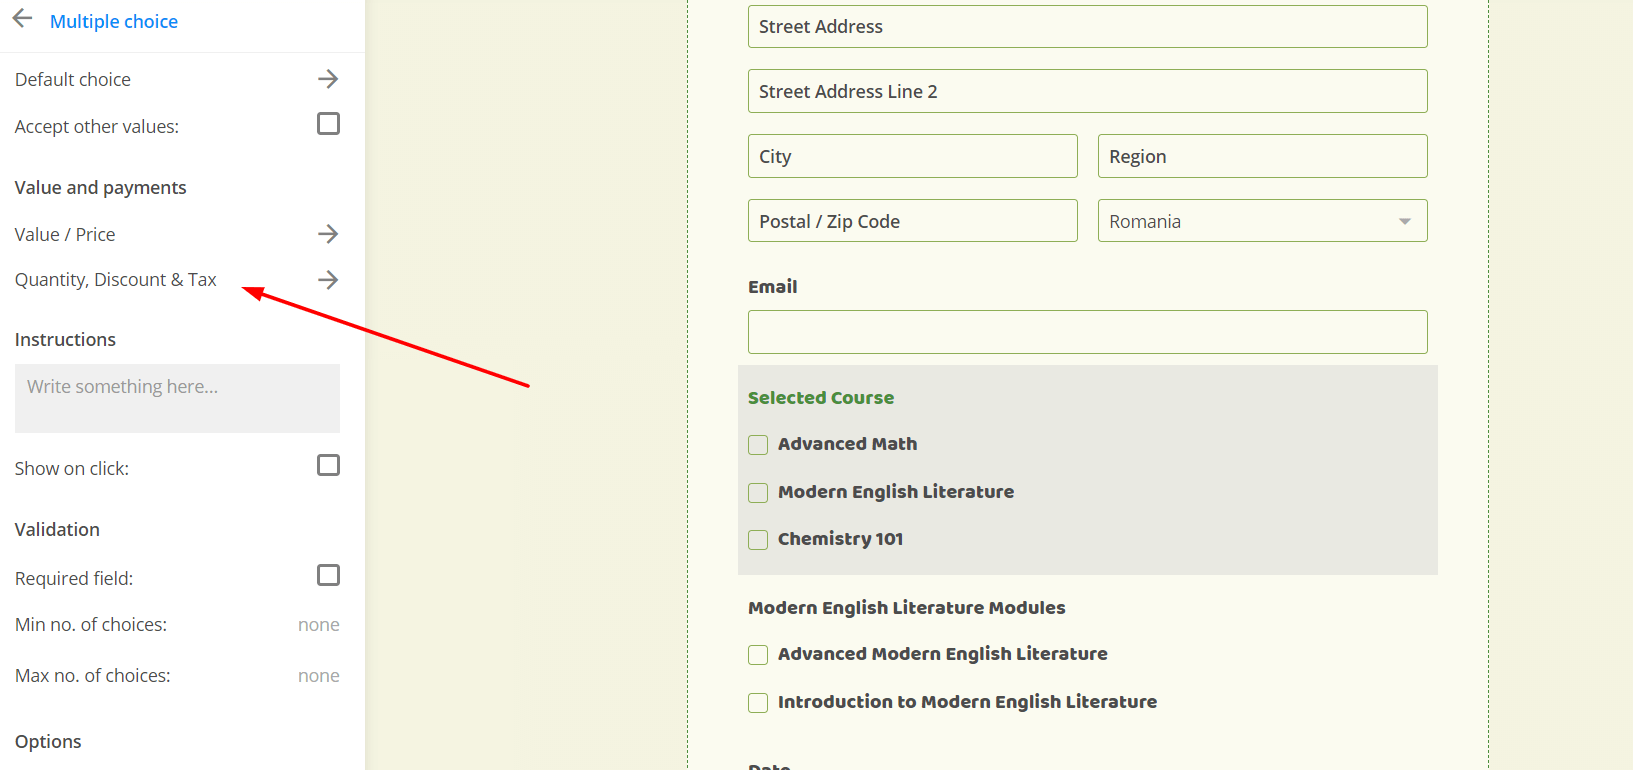 26. A pop-up window will appear on your screen. From here, you can add items in your fields and associate them with a monetary value. To do this, click on the “+” sign at the top right-hand corner of the pop-up window.
 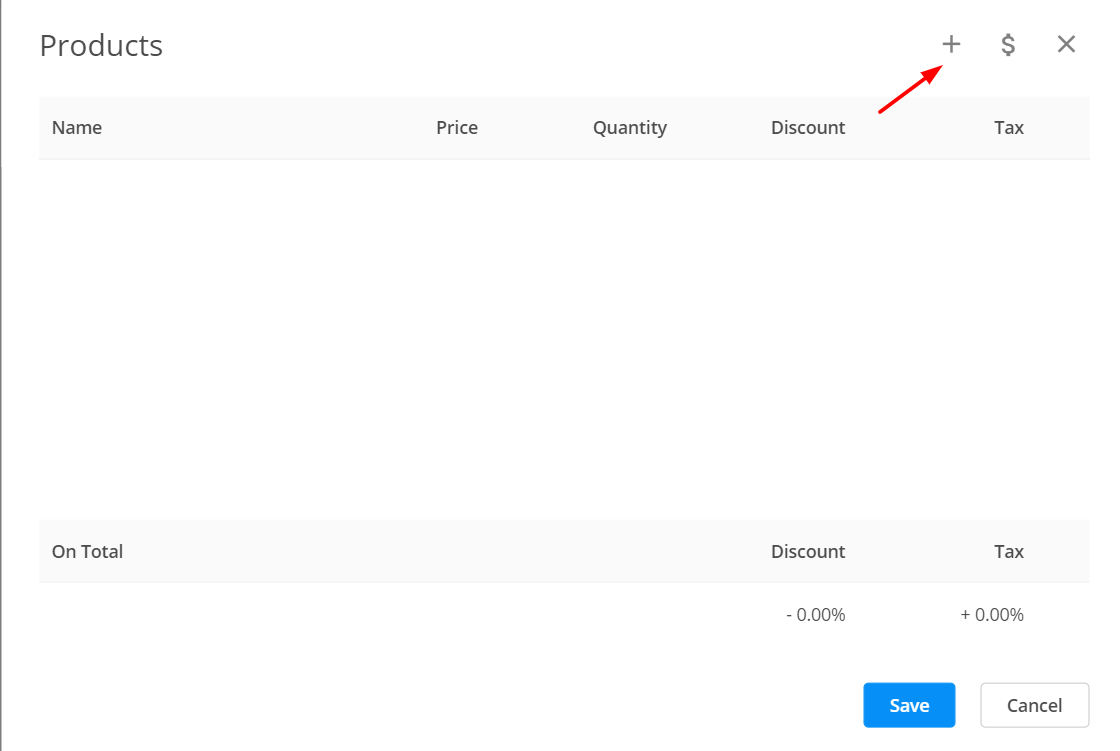 27. You can select a fixed amount (for all the items you are selling) or you can select a field (such as a multiple-choice field, for example). We selected our “Selected Course” field to exemplify how you can associate each of the courses with a different monetary value.
 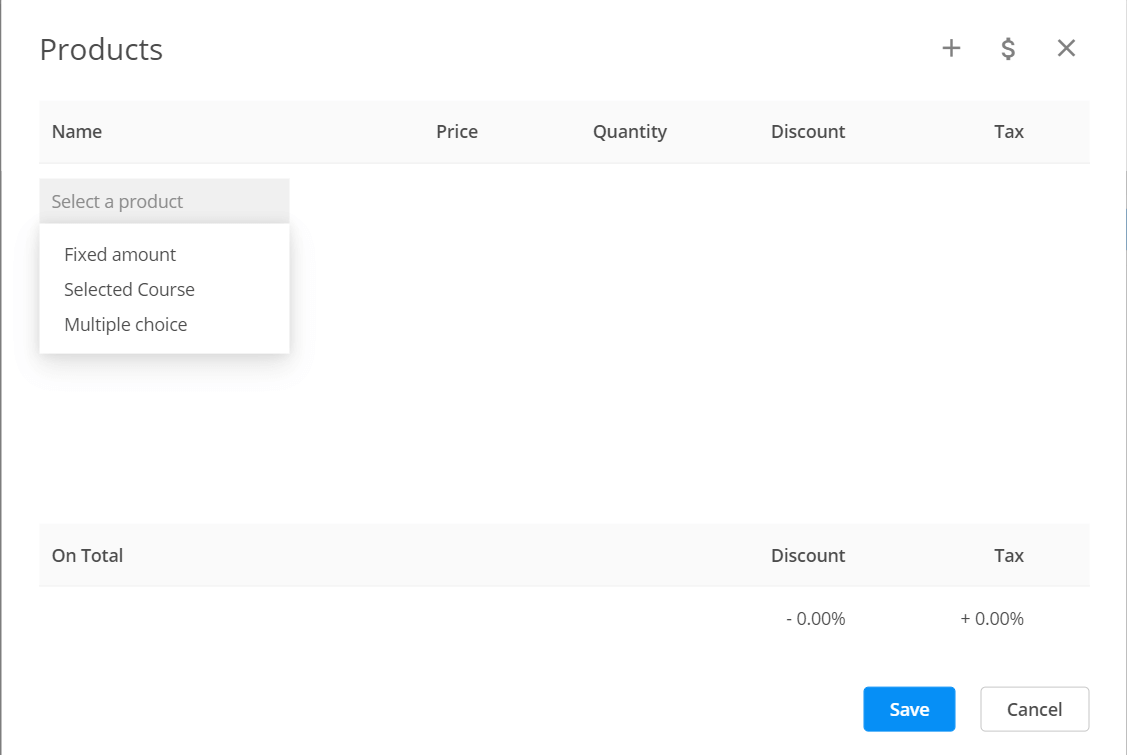 28. To add the price, click on the “Multiple” button in the Price column.
 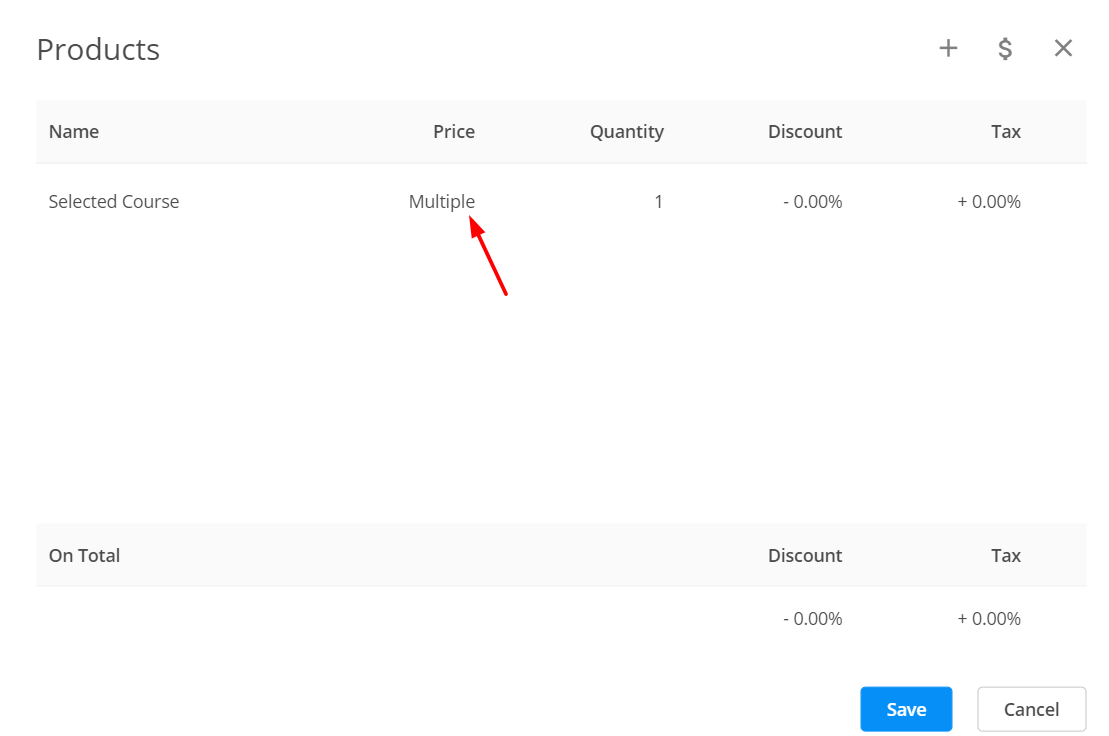 29. Add your values in the boxes on the right-hand side of the screen and then click on “Save”. You will be redirected to the initial pop-up window. Click “Save” one more time to save your products and their pricing.
 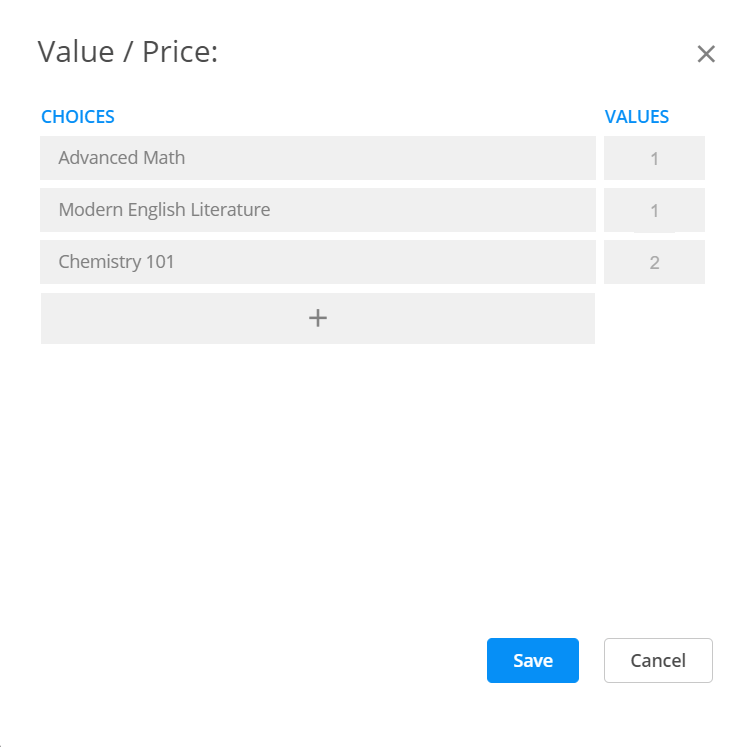 30. To add a payment processor, go to the “Payments” in the left hand sidebar.
 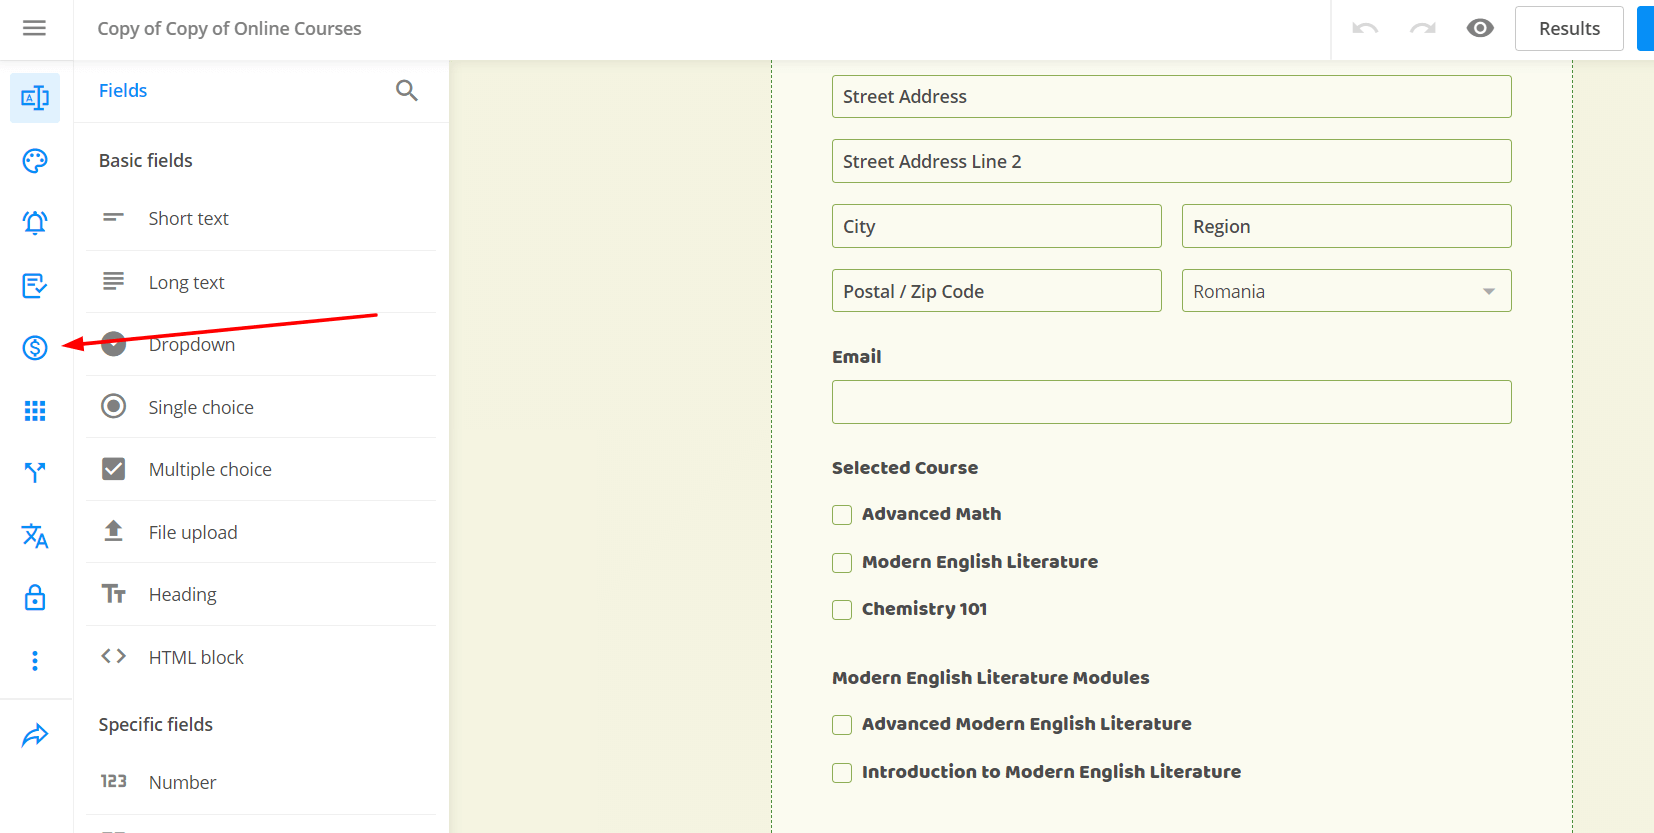 31. Select the payment processor you want to integrate from the list in the left-hand column.
 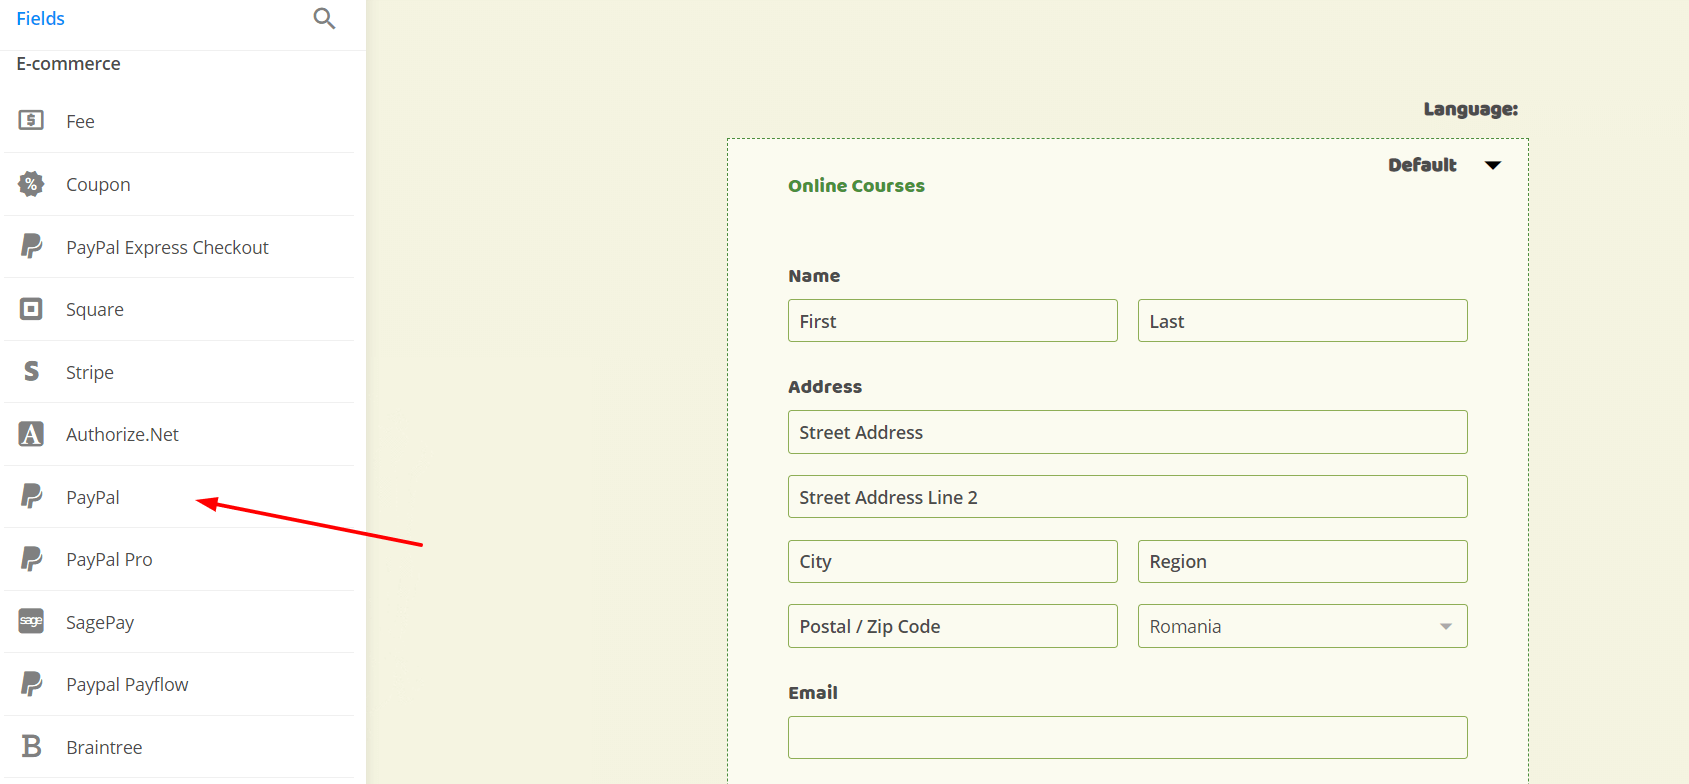 32. Click on “Enable” and add all the necessary information. Since we selected PayPal, we had to add “our” PayPal email address (do keep in mind that the email address you see in the screenshot is a fictional one 🙂 ).
 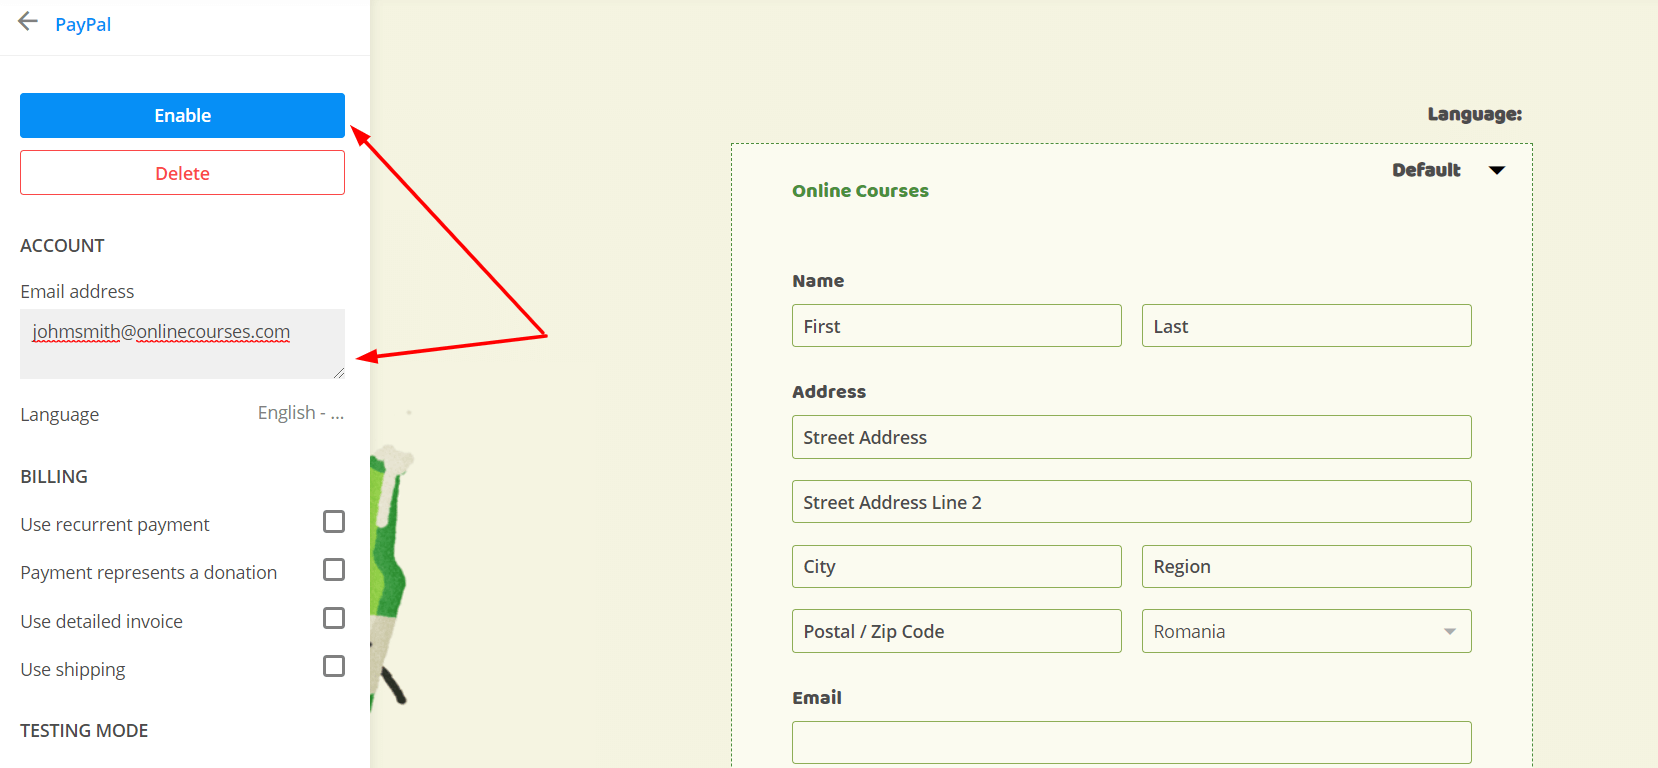 33. This is how our Thank You message looked after integrating PayPal, for example.
 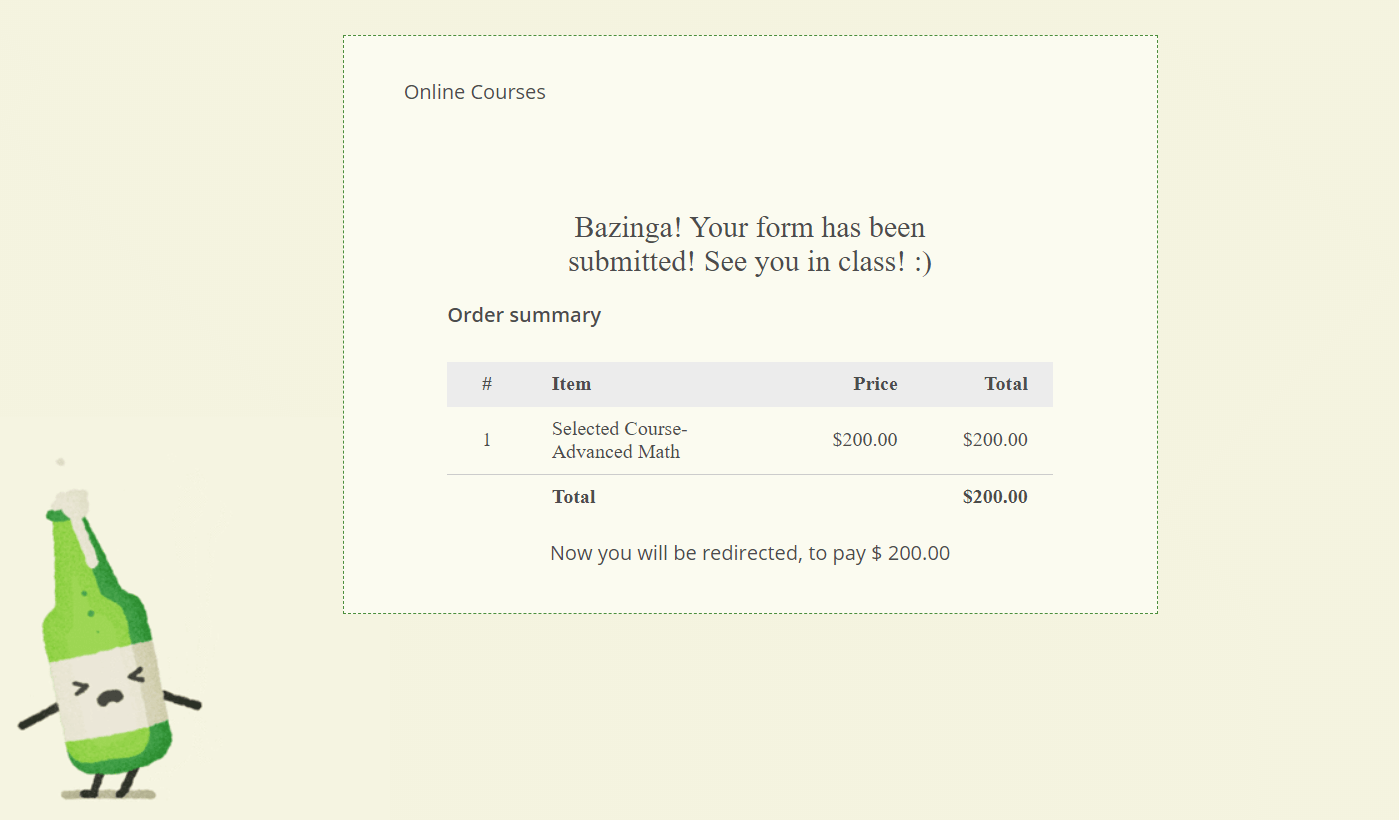 As soon as this screen was shown, the user was redirected to a PayPal payment page, as you can see in the image below.
  123FormBuilder will also allow you to set up notifications regarding payments. To do this, you will need to follow the following steps: 34. Go to “Settings” and click on “Notifications” (I bet you know the drill already 🙂 ). 35. Click on “Add New Email”. 36. Set up your email notification by selecting “Payment is processed” from the “When” drop-down menu. You can also add a personalized message, as we did in our case:
 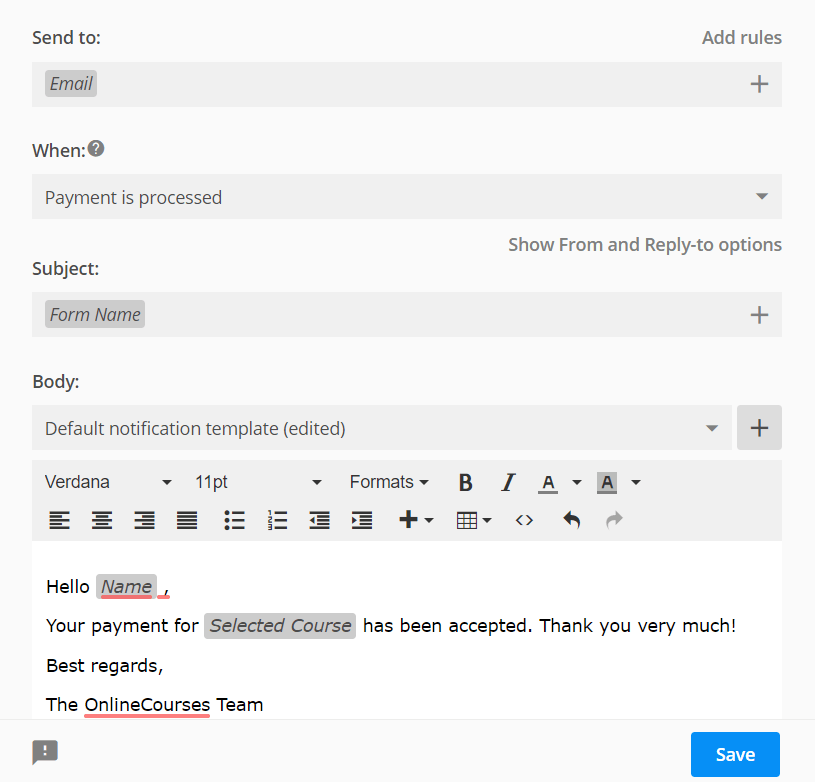 That’s it! Following these steps will allow you to set up a registration form for your online course, as well as receive payments and send/ receive notifications regarding different activities on your form. Wondering how the form will look like after adding a payment processor to it? This is it (by the way, you can interact with this form and see how it would look like on the end of the user).
Extra-Bonus: Your Form, Your Course, Your Exams
What if we told you that you can use 123FormBuilder to create actual courses – and test your students through the same platform? It’s actually easier than it sounds, you don’t need to know how to code, and the results can be quite impressive. To integrate your courses with 123FormBuilder, you should first upload your course to YouTube. Then, you should create a blank form from scratch, as shown in the first section of our guide. To add your video to the form, simply: 1. Go to your form. 2. Add a video field. 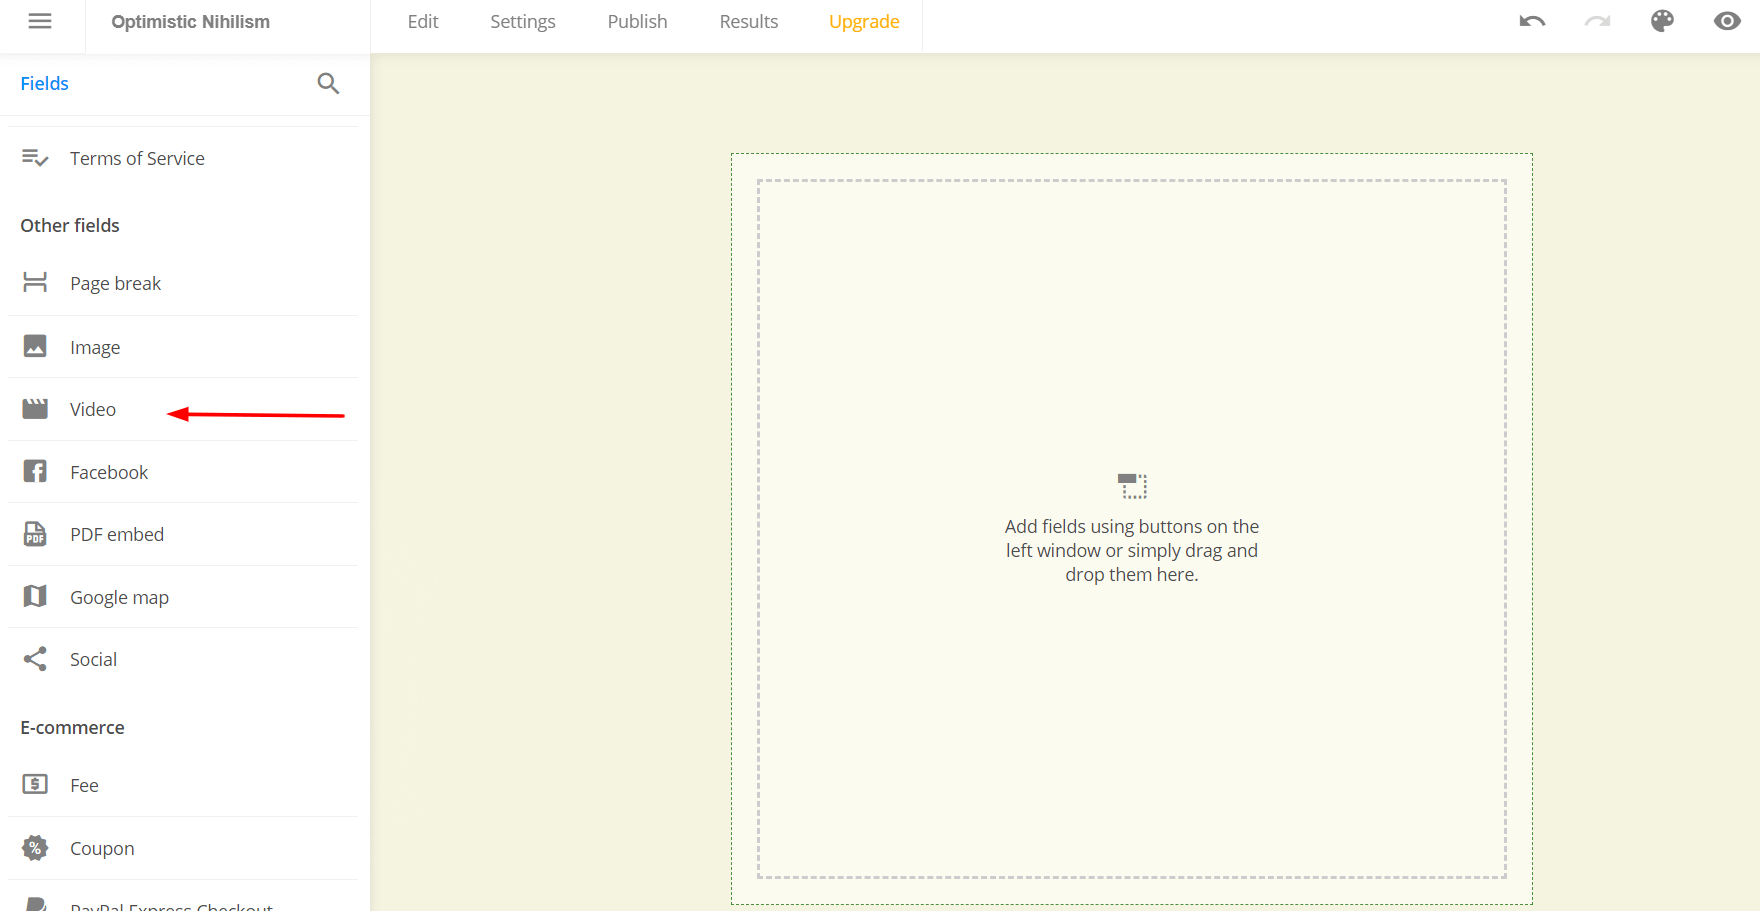 3. Copy and paste the link to the YouTube video in the field.
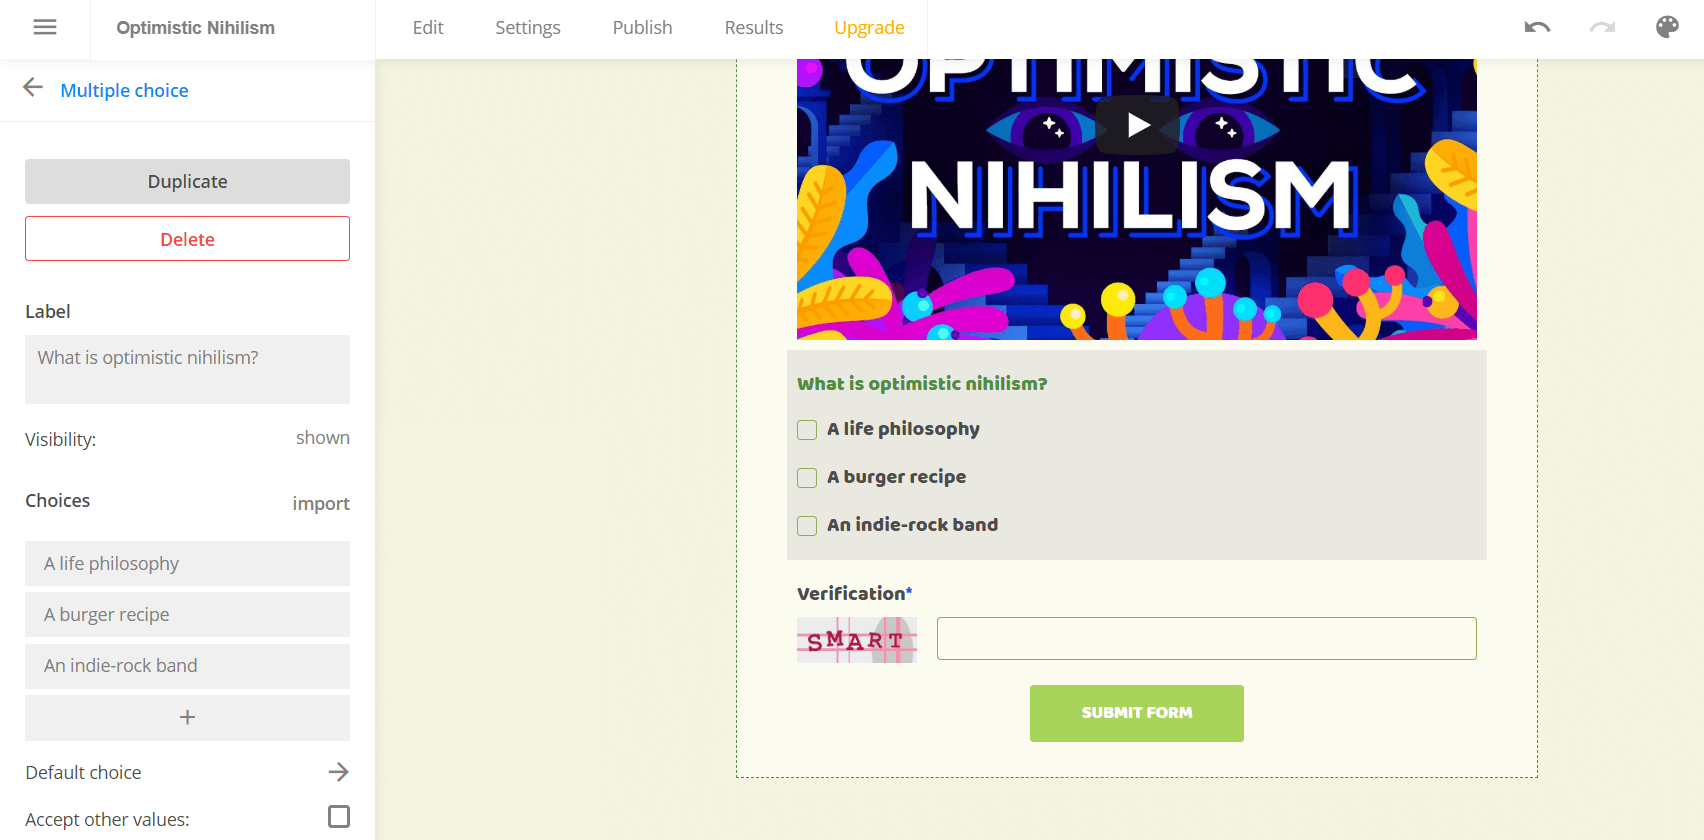
 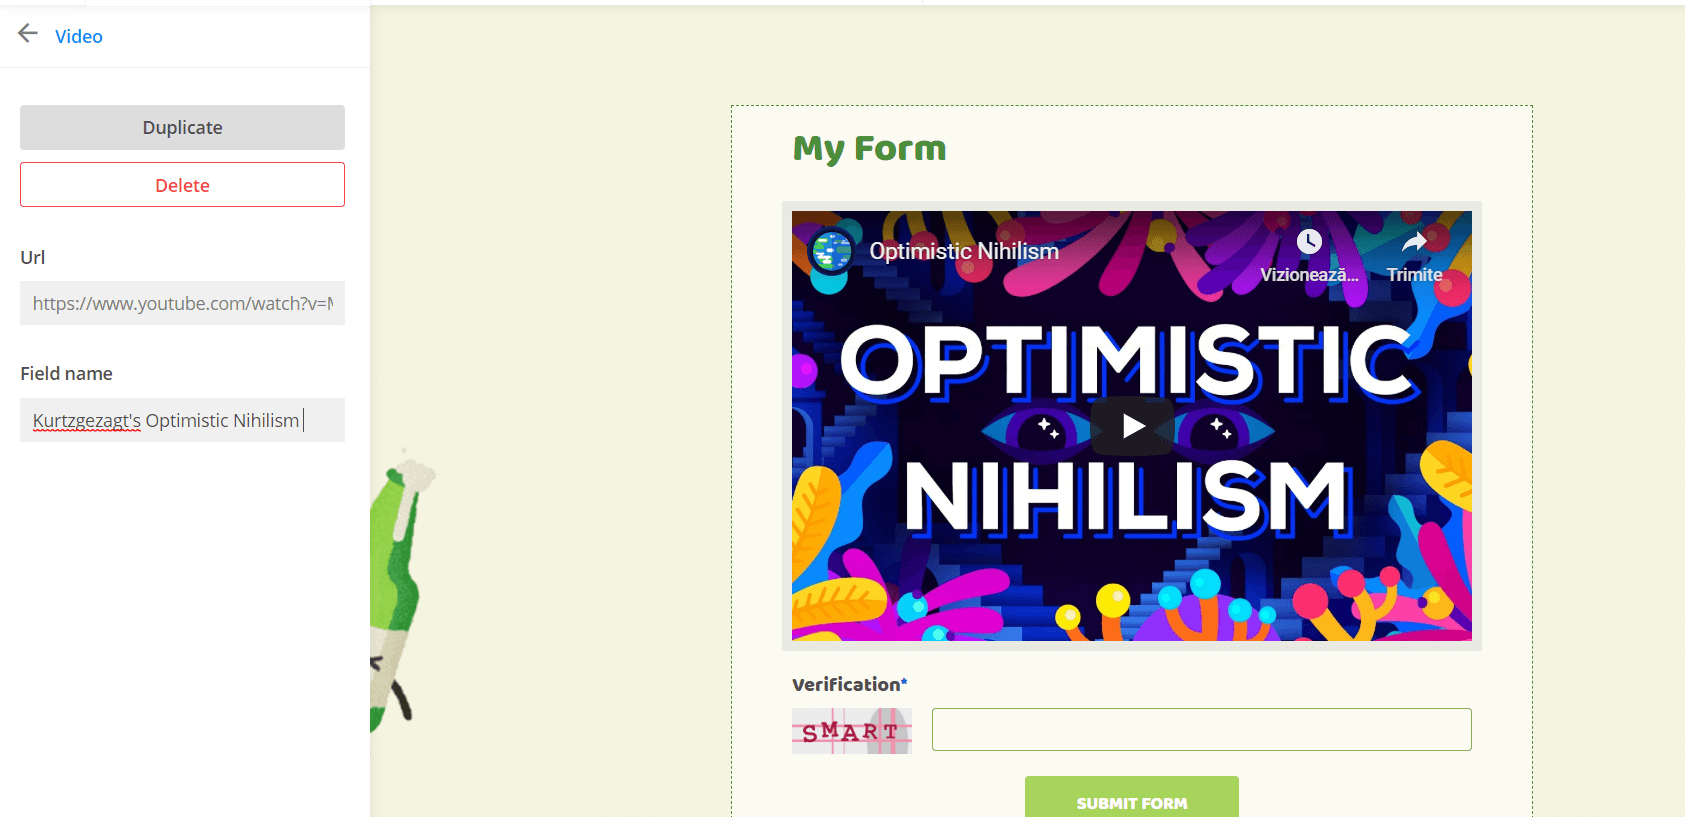 You can also test your students using the same form, by simply adding multiple-choice fields for each question and enabling them to behave like a quiz. To do this, follow these steps: 1. Add your first question using a multiple-choice field. Edit the answer options as you see fit.
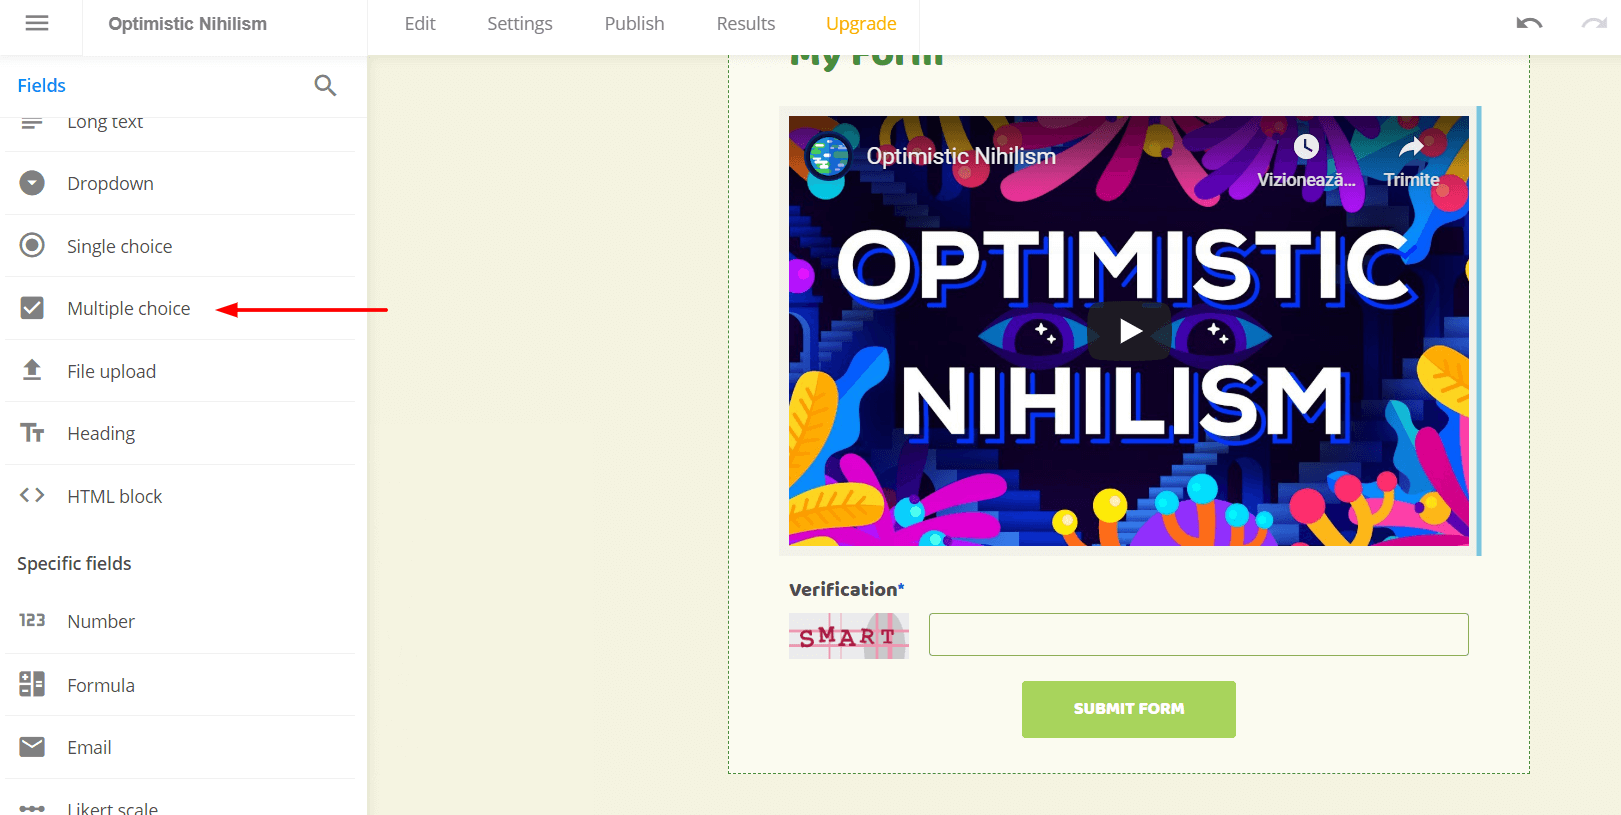
 2. In the menu on the left-hand side of the screen, scroll down to the “Quiz Options” button and click on it.
 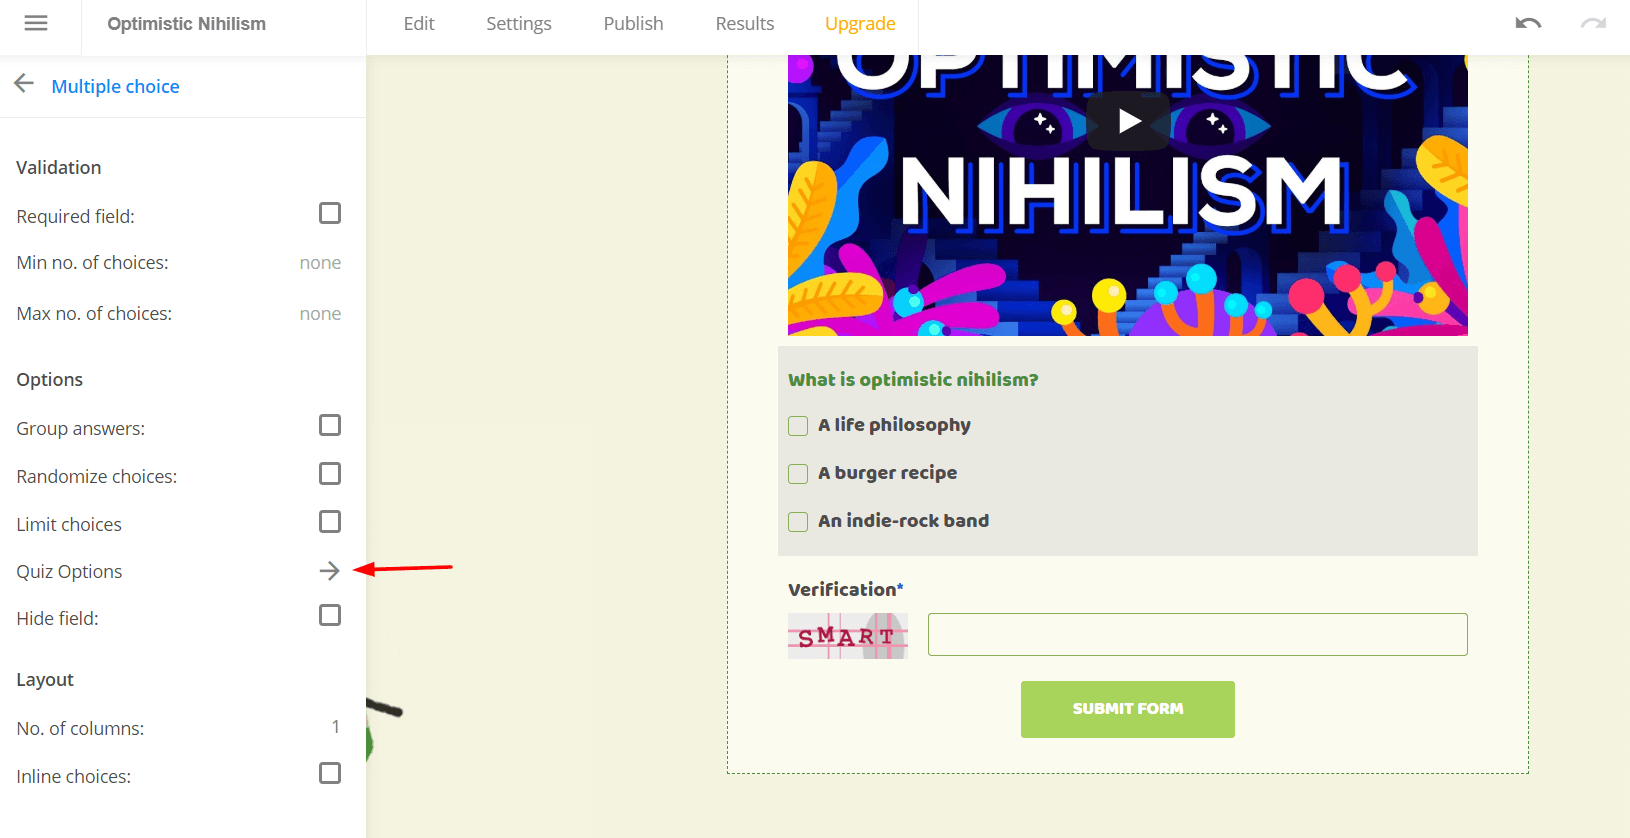 3. Set up your quiz points (how many points students get for each answer option, which one is correct). You can also allow for multiple answers to be correct, or you can give a different number of points for each answer.
 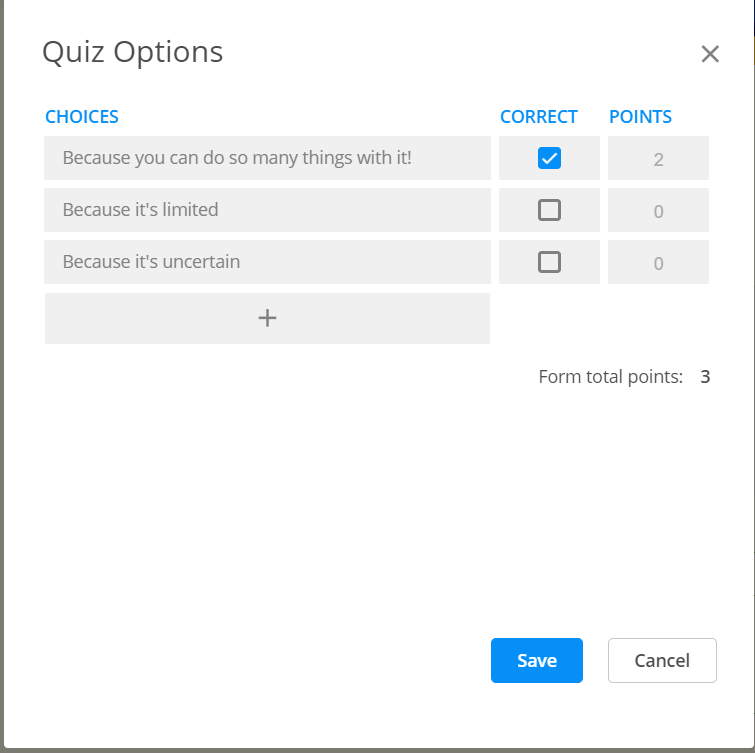 4. If, for example, you want to make sure your students don’t skip any question, you can enter a minimum number of choices.
 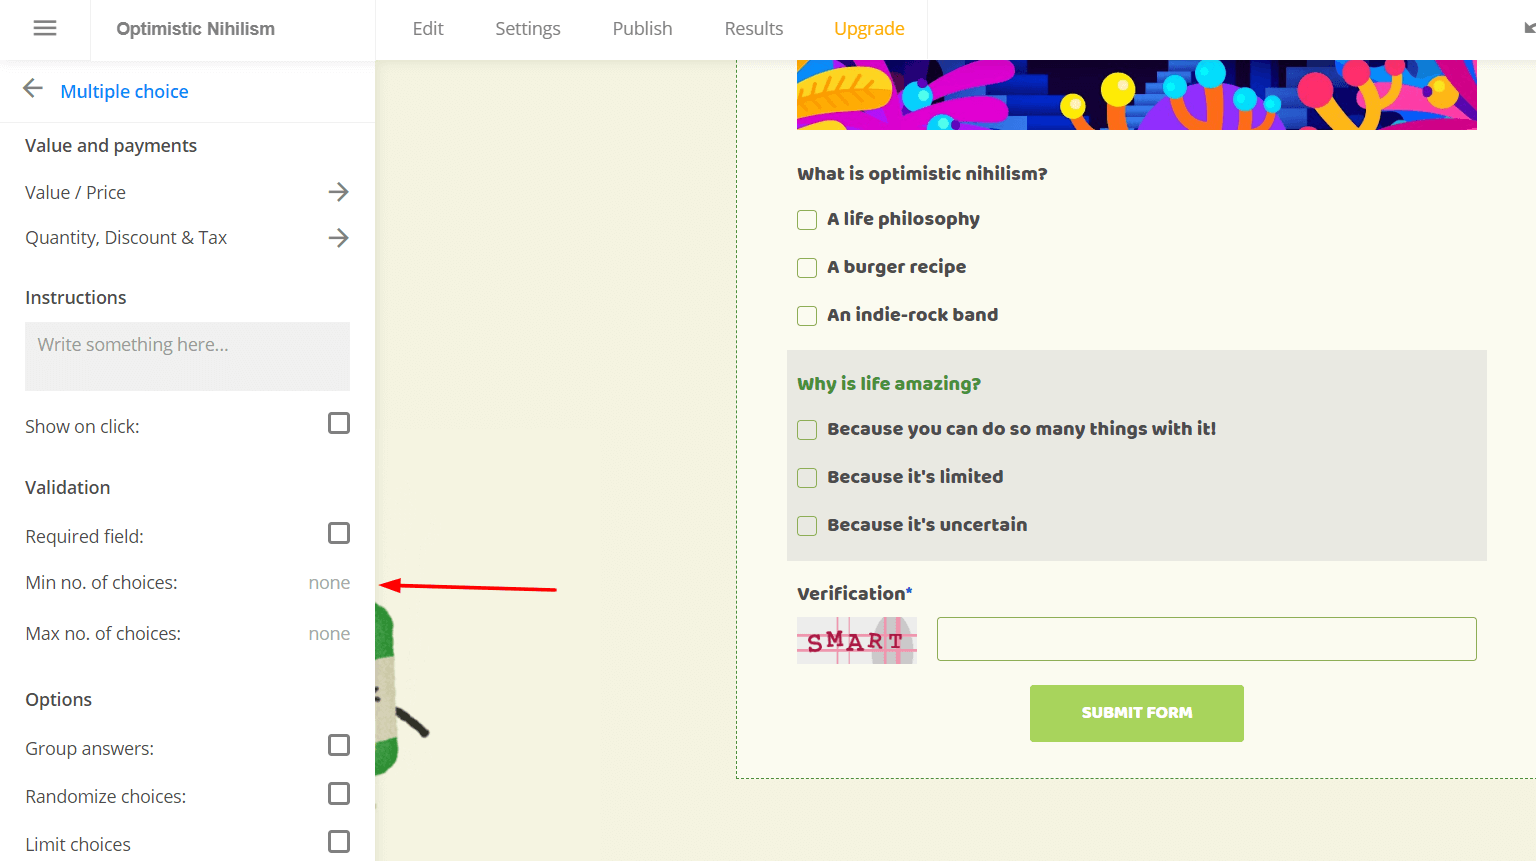 5. You can also prevent students from cheating by learning the number of the answer by heart. To do this, you simply have to click on “randomize choices”. This will mix up the answers in the multiple-choice question (so students won’t be able to simply learn them by heart).
 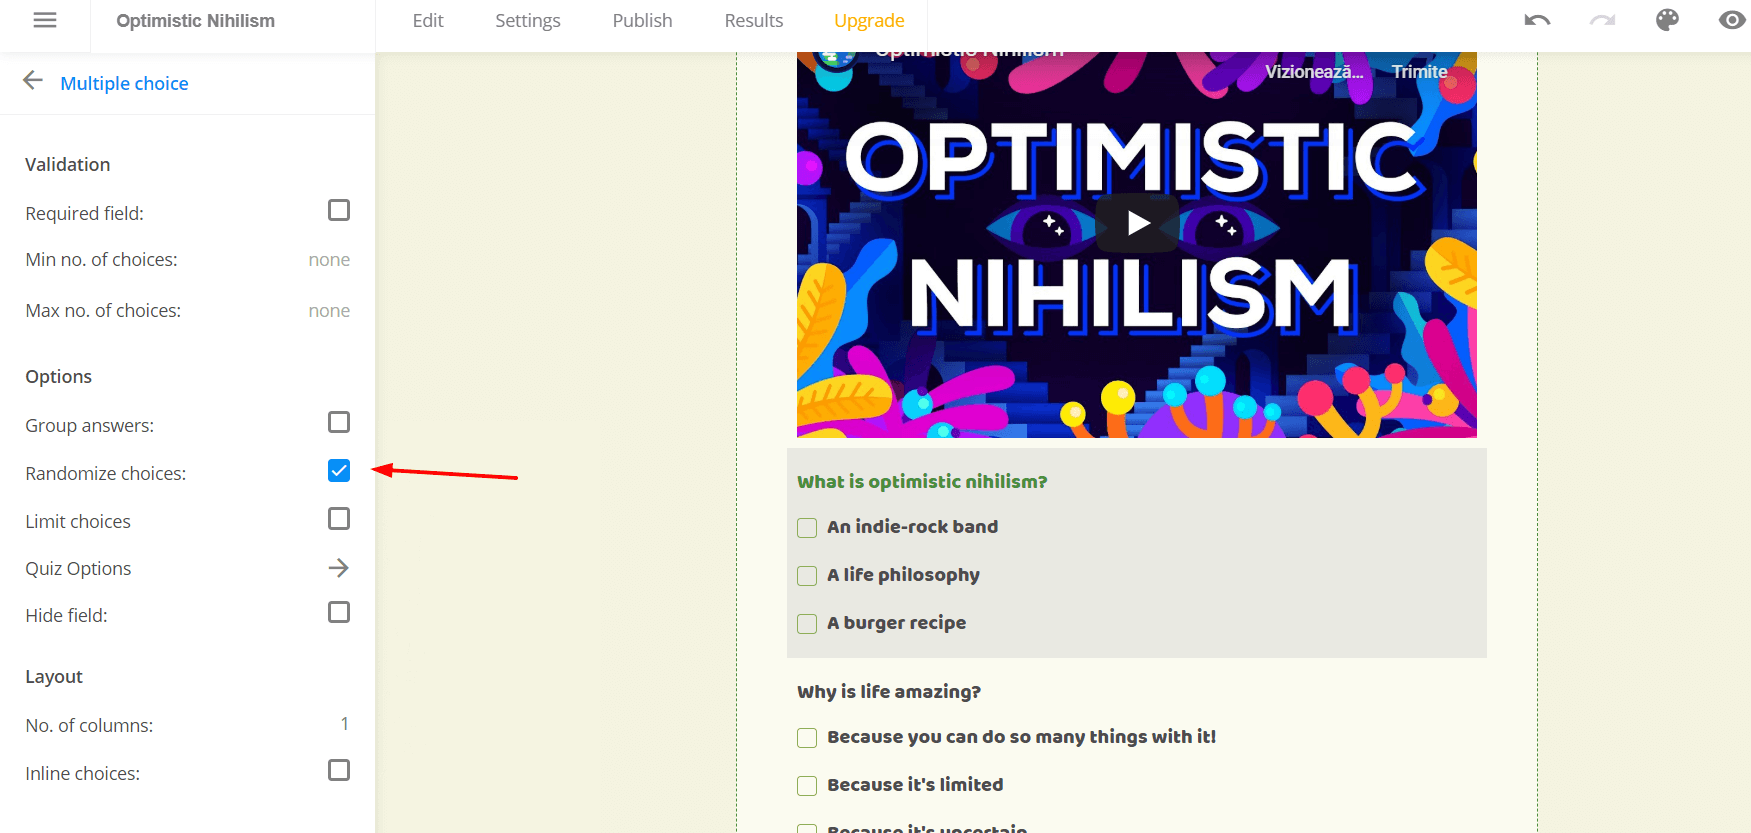 6. Add your second question using a new multiple-choice field and proceed the same way as you did with the previous question. Repeat as many times as needed.
 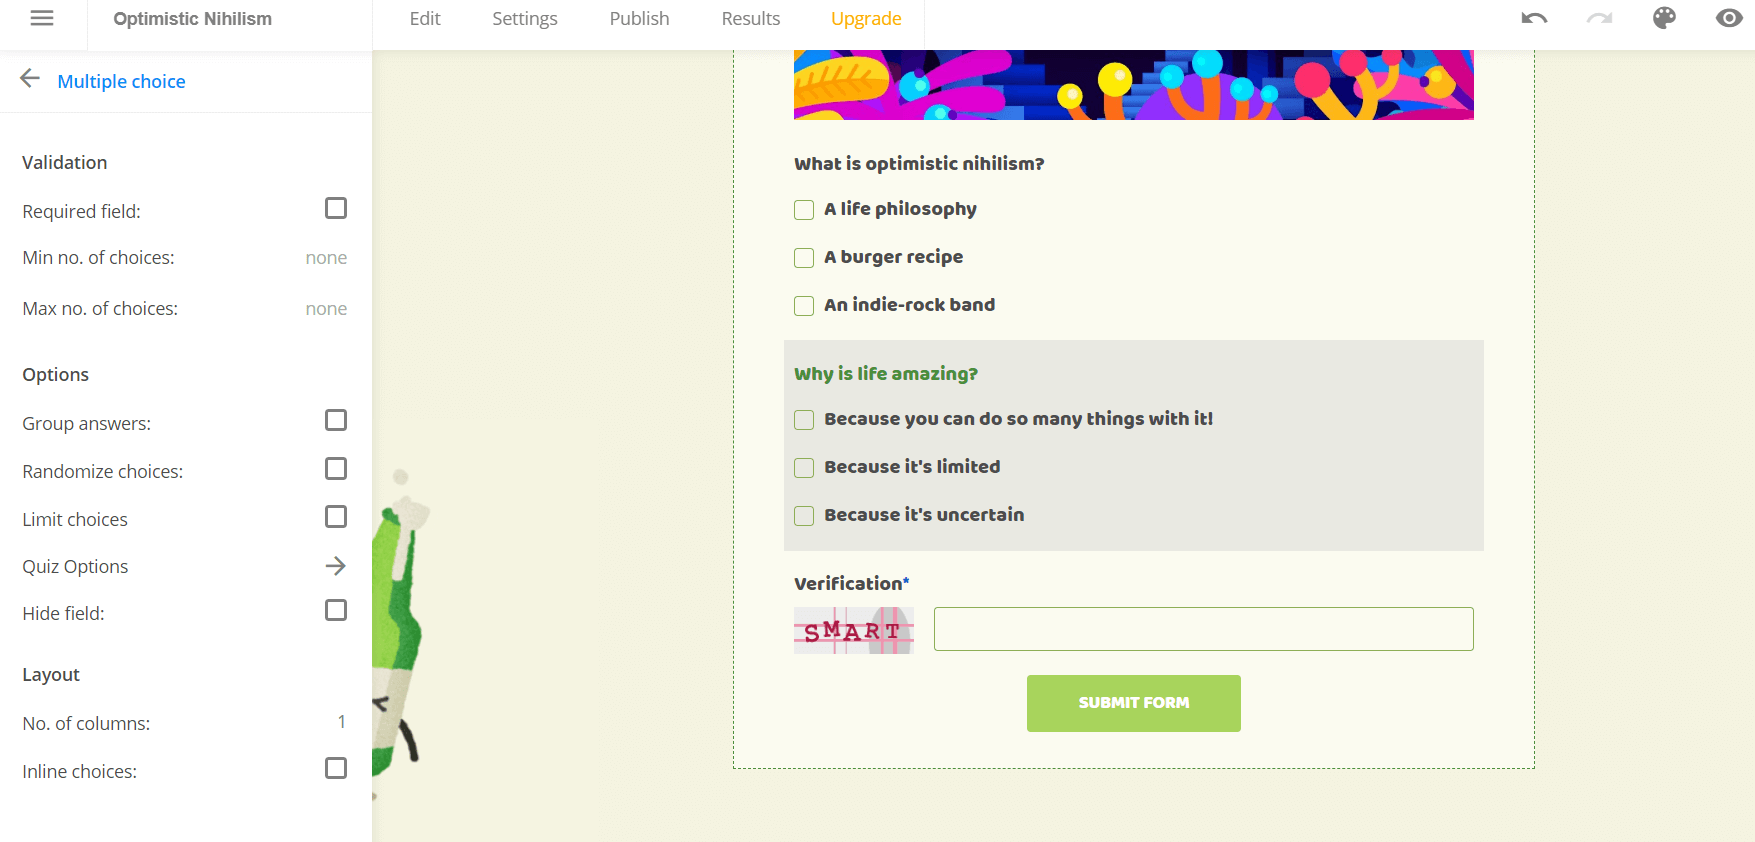 7. You can allow your students to see the results instantly (instead of the Thank You page displayed upon submission), or you can send them the results via email.For the first option, go to “Thank You Page” on the left-hand sidebar menu. 8. Click on “Show quiz results” and edit your Thank You page message from the box underneath.
 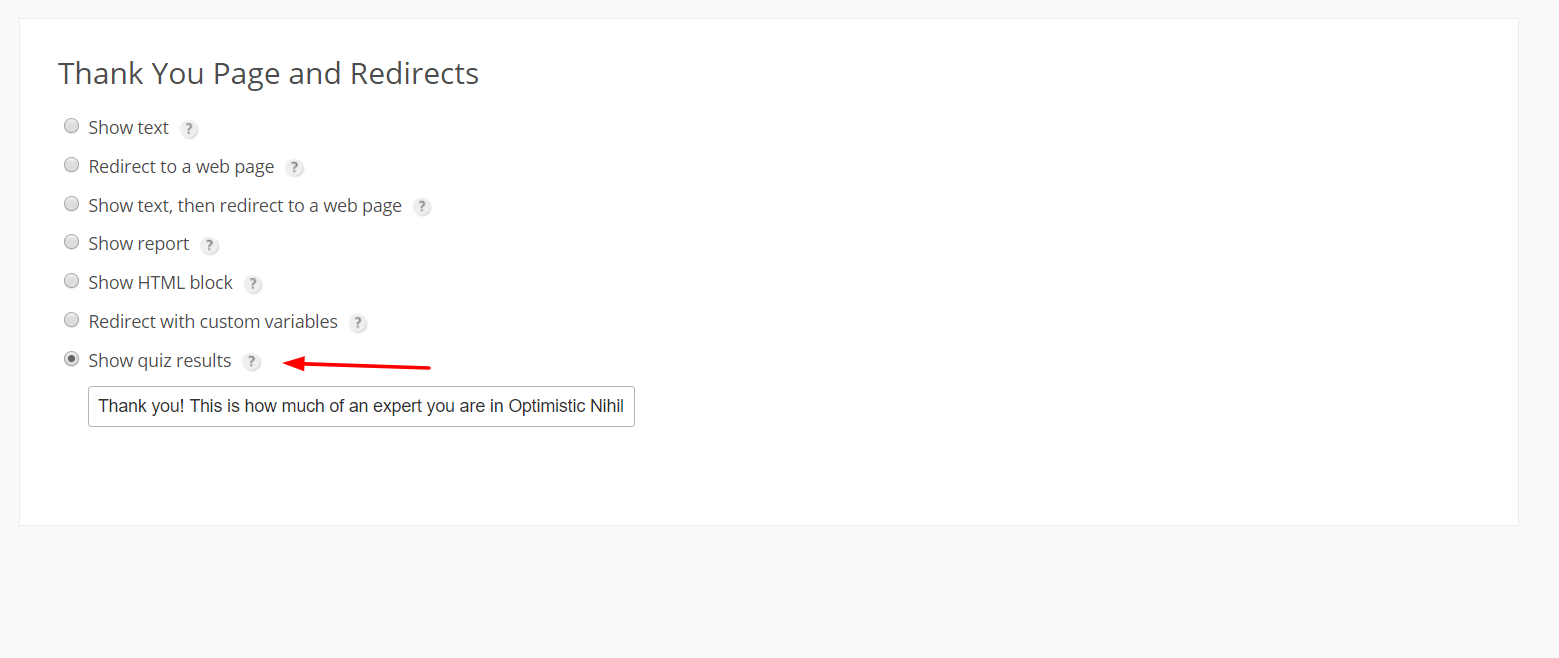 9. Click on “Save” at the top right-hand side of the screen.
 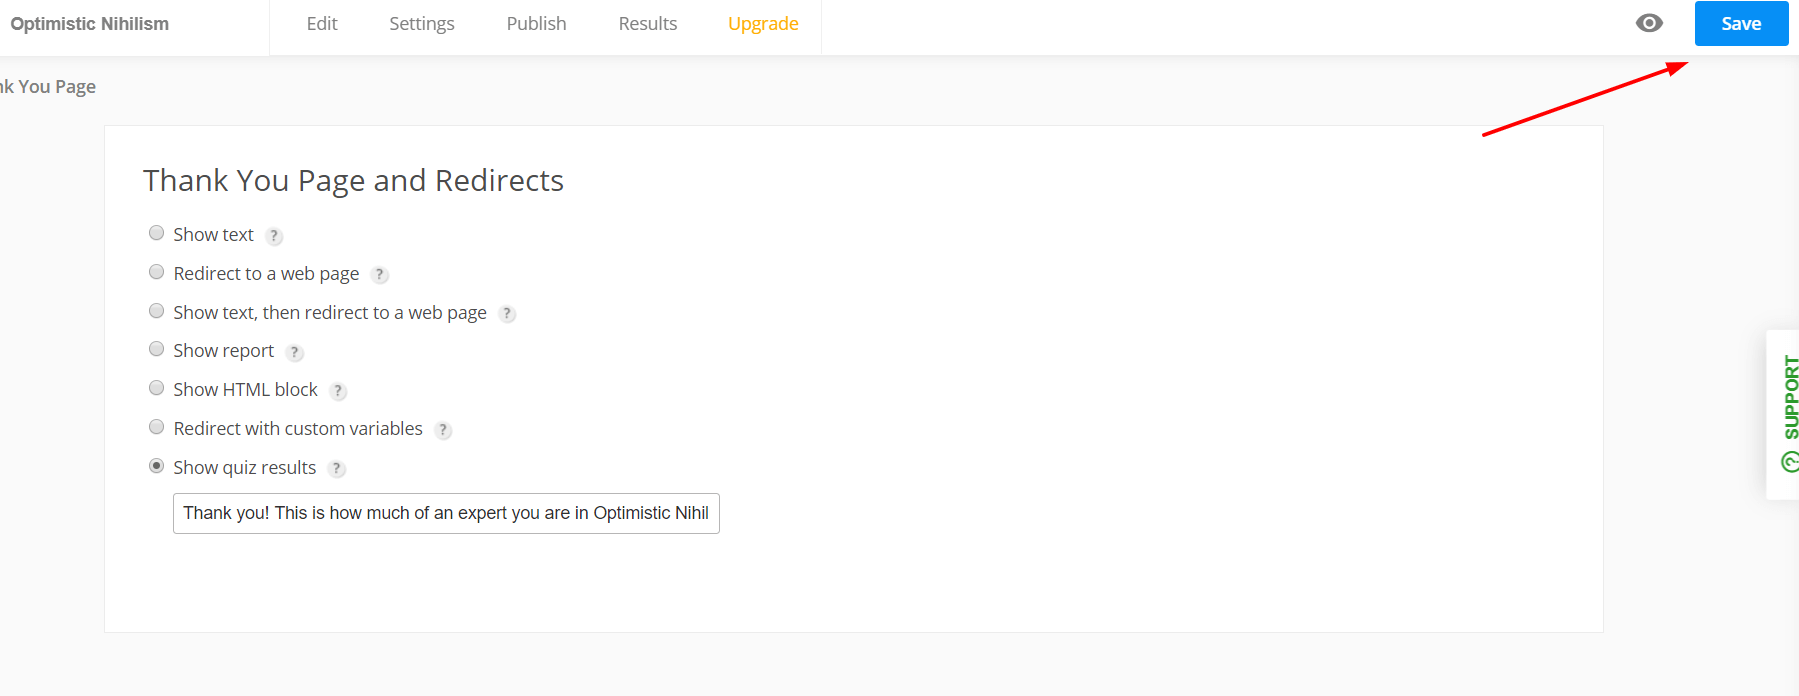 By following this route, your Thank You message will display the quiz results as well, as you can see in the image below.
 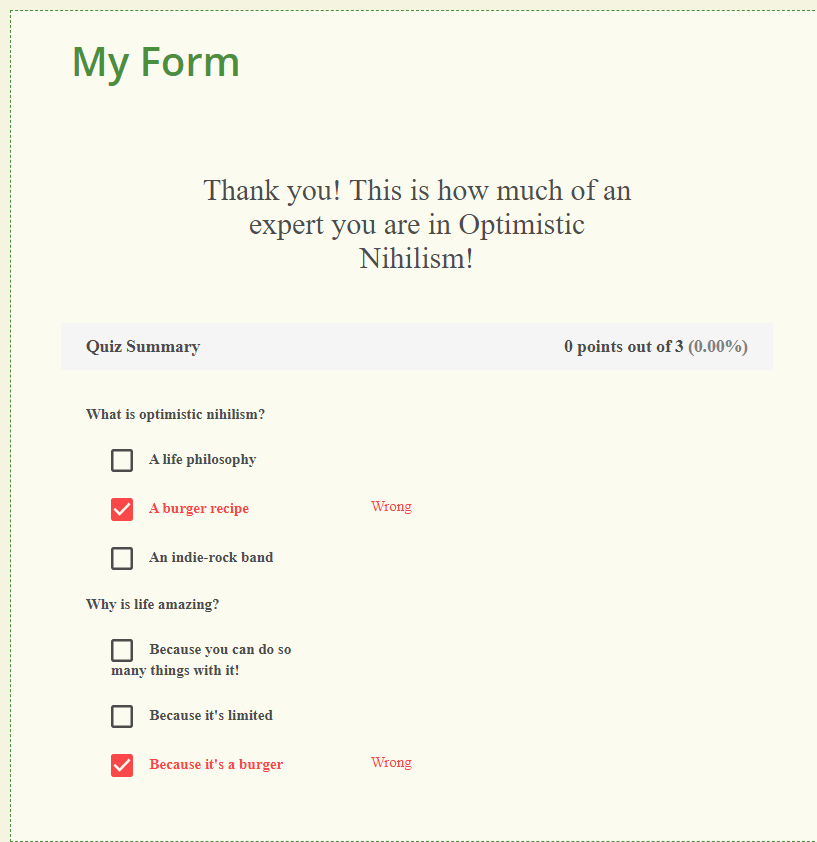 If you want to send the results via email, you can do so by setting up a notification: 10. Add a “Name” and “Email” field to your form, as shown in the first section of this guide. As you can see in the image below, we also added a short instruction for the user to know why their email address will be used. Keep in mind that if you are liable to GDPR rules (i.e. if your students might be located in the EU), you might have to create a longer disclaimer to let them know you will not be using their personal data in other ways than those described in the disclaimer. This stands just as true for any form, not just quizzes, by the way.
 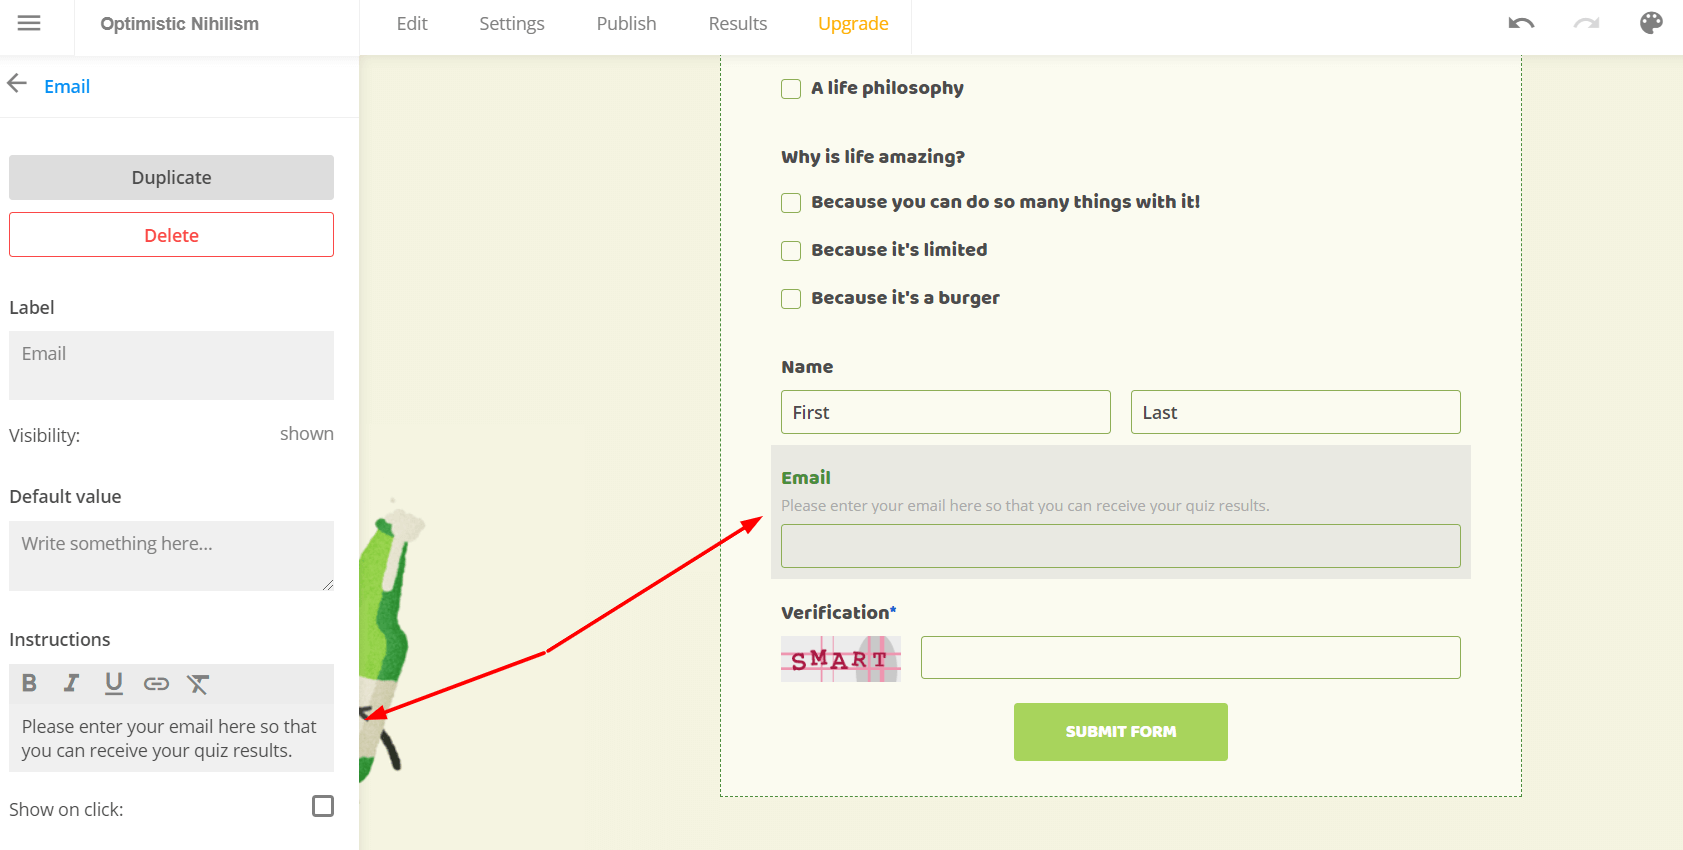 11. Once you have set up your personal information fields, go to “Notifications” in the left-hand sidebar. 12. Set up a Notification to be sent to “Email” and select the “Quiz template” option for the Body. We customized our email a bit by selecting the “Form is submitted + Delay” option in the “When” section (and by selecting a delay of 3 minutes from the moment the form was submitted). We also customized our email body a bit to make it feel a bit more friendly (we added a “Name” variable and a polite introduction as well).
 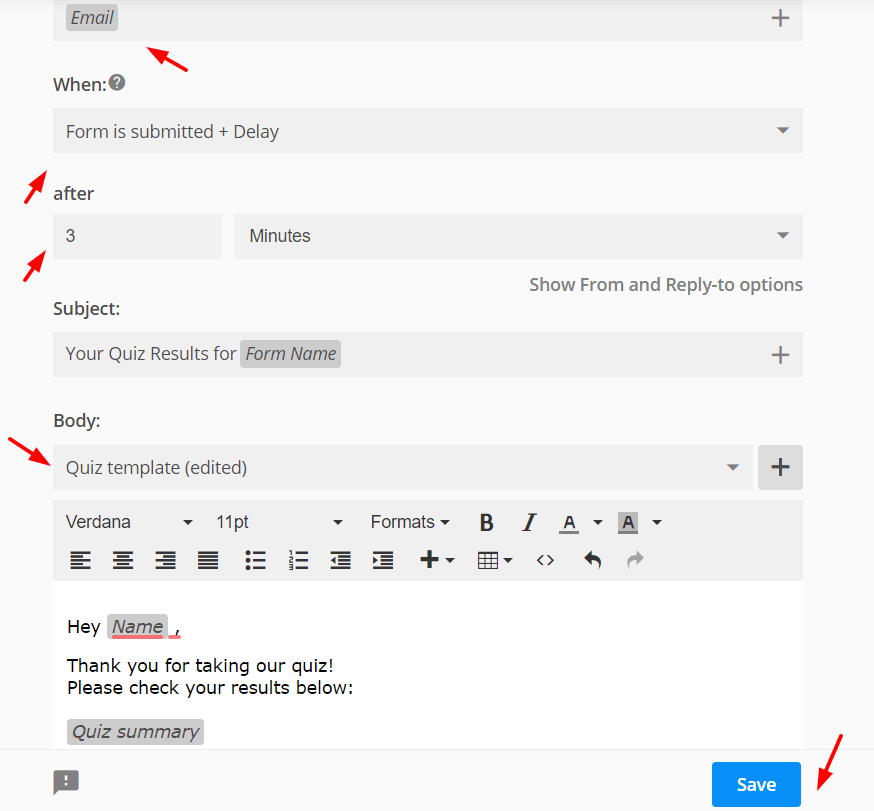 13. Click on the “Save” button when you are done personalizing your email. This is how the notification email will look like at the end of the user:
  Not only can you use this quiz to engage students and test them, but you can also use it as a marketing lead magnet. Moreover, you can use it to determine if there might be something your course hasn’t been that clear on. To do this, go to “Results” and click on “Submissions”. If you notice most students have answered a question incorrectly, you might be able to use this to adjust your course and make it more clear.
 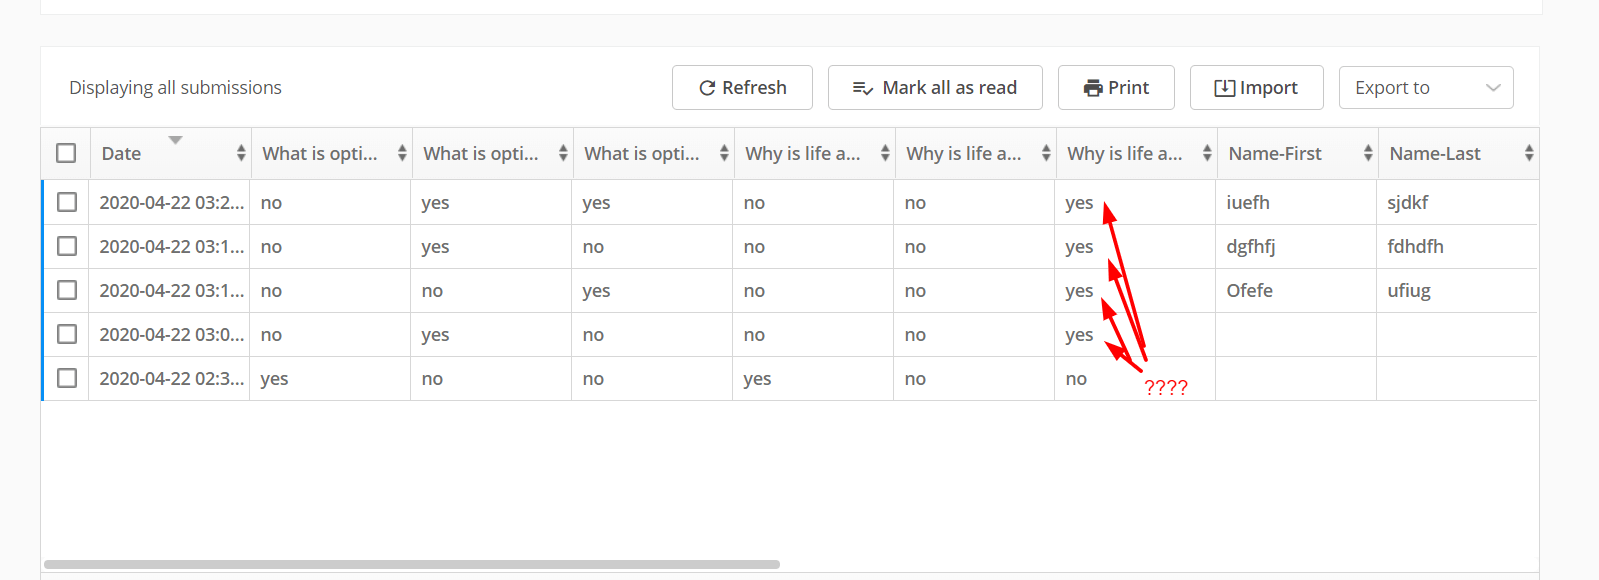 In the end, this is how your quiz would look like.
Last, but not least, keep in mind that 123FormBuilder is fully integrated with a myriad of other tools – such as Wix and Get Response, for example – and you can use this to your advantage to quickly and easily create online courses your students can attend from the comfort and safety of your own home. For instance, let’s say you use Calendly to set up your appointments. You could, for example, connect the 123FormBuilder platform to your Calendly. Although there is no direct integration, you can easily do this by adding a HTML block field to your form and entering your Calendly link in the HTML block (all of the actions are shown in the screenshots below). To do this, follow these steps: 1. Add an HTML block field to your form. 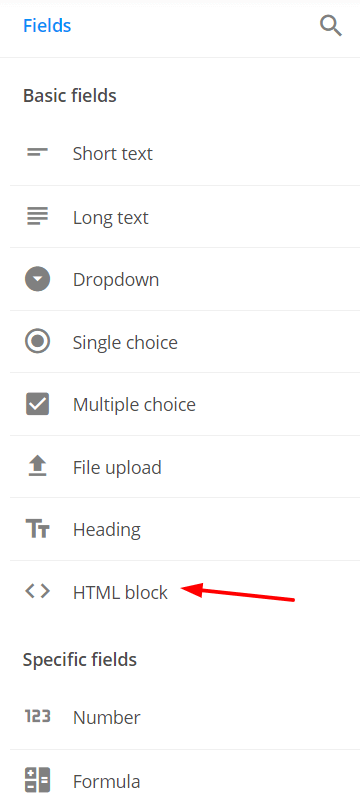 2. Click on “Edit text”.
 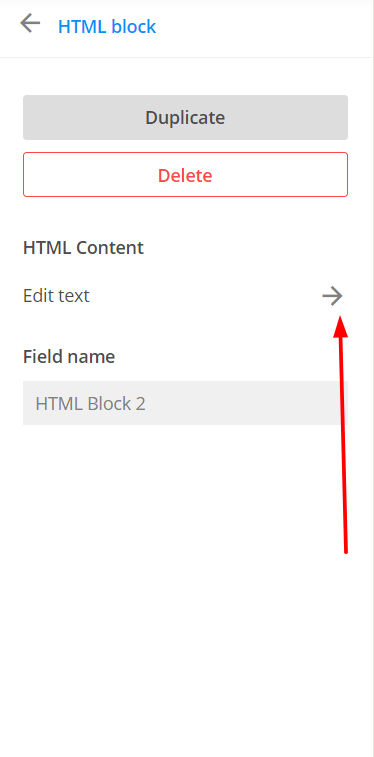 3. Click on the “Source code” button.
 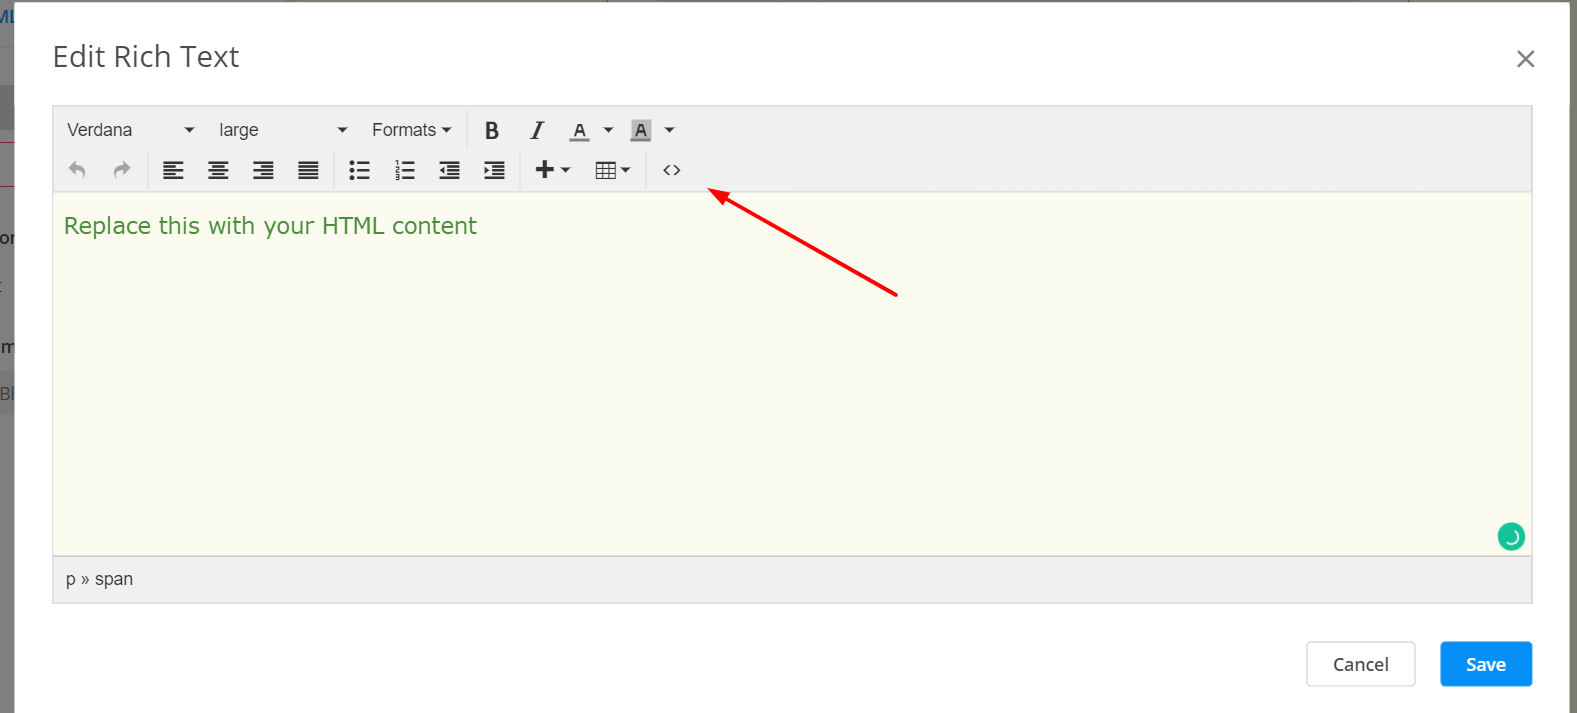 4. Add your HTML block as shown below.
 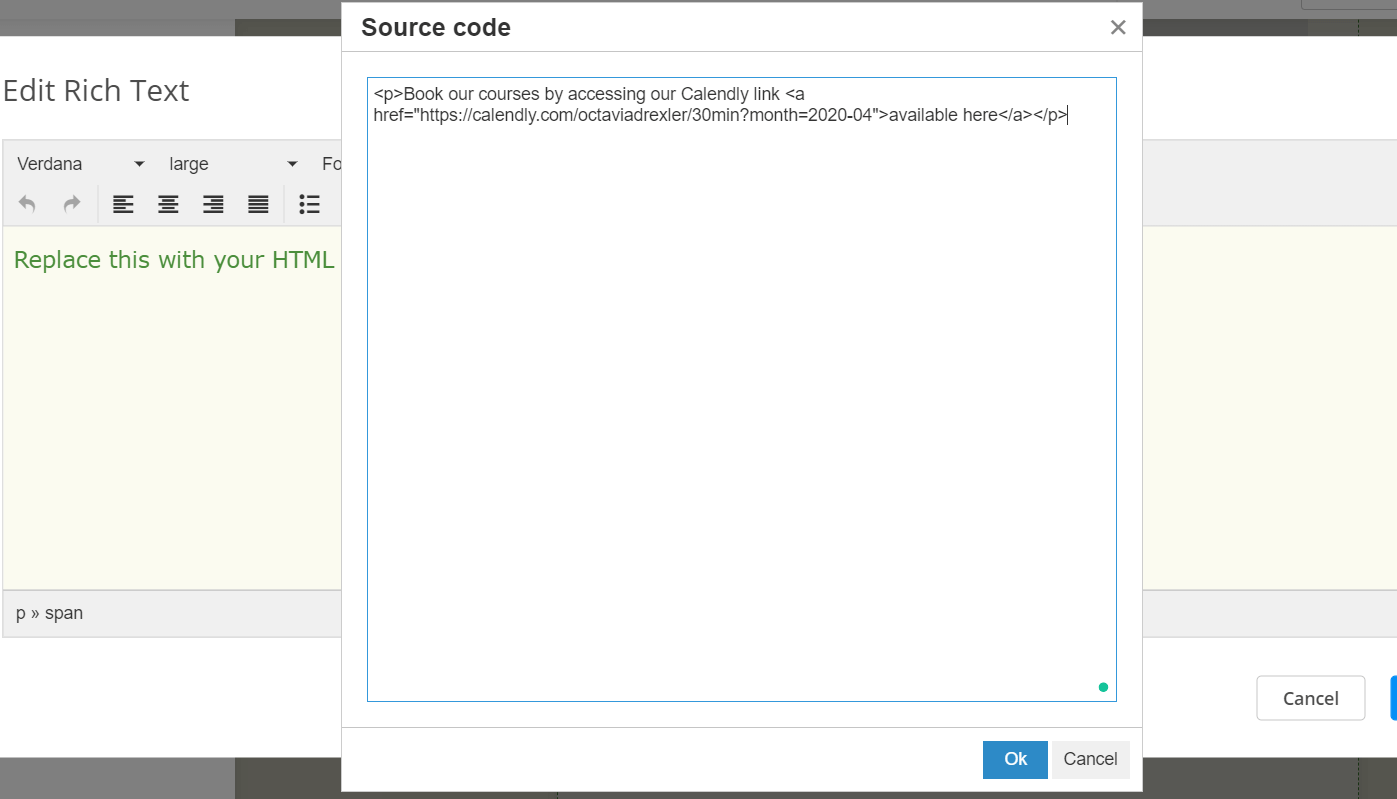 This is how your Calendly link would look like in the form:
 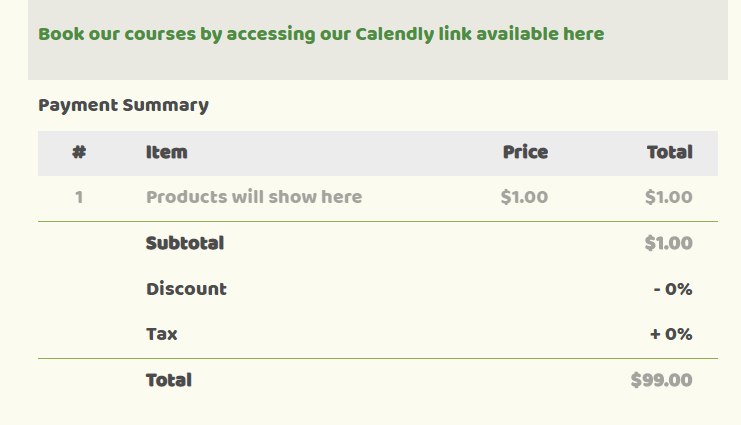 By the way, below you will find the HTML code we used for this, just grab it, follow the instructions and the screenshots, and replace the Calendly link we used there with yours.
 <p>Book our courses by accessing our Calendly link <a href="Insert your Calendly link here">available here</a></p>
A simple form and a quiz can absolutely turn everything around for you and make your online move a little easier – and building it does not have to require any kind of coding knowledge whatsoever, as we have shown it in this guide!
Load more...